
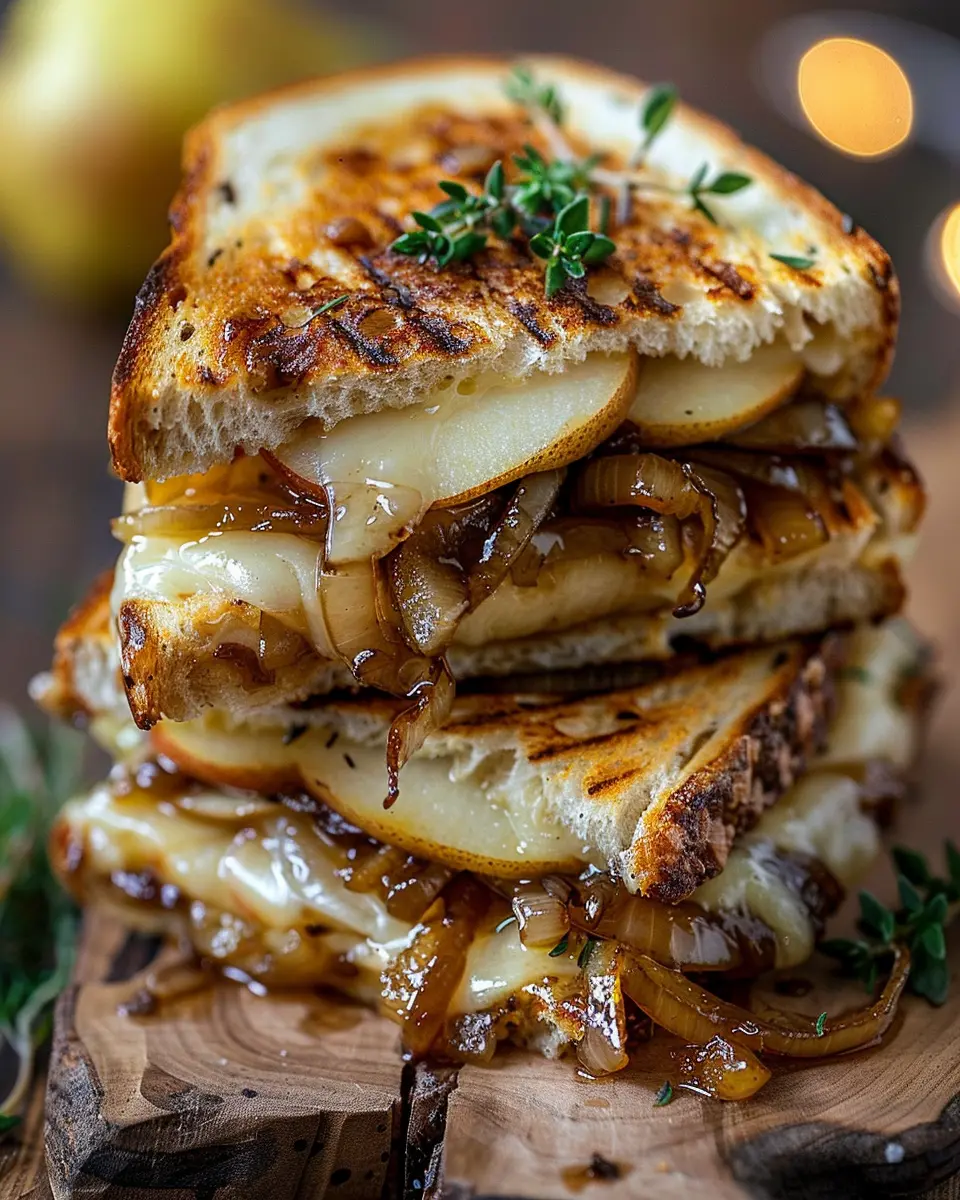
Introduction to Pear & Apple Grilled Cheese
If you thought grilled cheese was all about melty cheddar and crunchy bread, think again! Enter the Pear & Apple Grilled Cheese. This delightful dish combines the sweetness of ripe pears and tart apples with the savory goodness of melted cheese, creating an irresistible comfort food experience that’s anything but ordinary.
Why Pear & Apple Grilled Cheese is a Game Changer
Imagine the first bite: the creamy texture of your favorite cheese melding beautifully with the fruity flavors of fresh pears and apples, all heightened by the savory, caramelized onions. This dish is not just a satisfying meal; it chats with your taste buds, offering a unique blend of sweet and savory that elevates the classic grilled cheese to gourmet status.
Here’s why this Pear & Apple Grilled Cheese is truly a game changer:
-
Versatile Ingredients: From sharp cheddar to creamy brie, you can use any cheese you love. The sweetness of pears and apples pairs well with almost any type. Add turkey bacon or chicken ham for an added savory kick, transforming the dish into a well-rounded meal.
-
Quick and Easy: Perfect for young professionals on the go, this recipe takes just a few minutes to whip up. Meal prep? No problem! Prepare the caramelized onions ahead of time, and all that’s left is grilling your sandwich whenever hunger strikes.
-
Health Benefits: Pears and apples are not only delicious but also packed with vitamins and fiber. According to the USDA, one medium pear provides about 22% of your daily fiber needs! A little delicious indulgence that’s good for you? Sign me up!
-
Impressive Yet Simple: Hosting friends or a casual date night? This recipe is sure to impress without requiring a culinary degree. Serve with a side of your favorite soup or a fresh salad for a full dining experience.
With all these benefits, it’s no wonder that the Pear & Apple Grilled Cheese is becoming a must-try recipe in kitchens everywhere. So grab your ingredients and prepare to experience grilled cheese in a whole new light. For more delicious ideas, check out Food Network or Bon Appétit for tips and tricks on elevating your culinary skills.
Stay tuned for the full recipe in the sections that follow!
Ingredients for Pear & Apple Grilled Cheese
Essential ingredients for a delicious grilled cheese
To craft the perfect Pear & Apple Grilled Cheese with Caramelized Onions, you’ll need a few key ingredients that bring out the sweet and savory flavors beautifully. Here’s what you’ll want to gather:
- Bread: Choose a hearty bread like sourdough or whole grain for that perfect crunch.
- Cheese: Go for a rich and creamy cheese like sharp cheddar or Gruyère, which melt wonderfully and add depth.
- Pears and Apples: Fresh, ripe pears and crisp apples are essential. Varieties like Bosc pears and Granny Smith apples work beautifully together.
- Onions: Caramelized onions are a must for that sweet, savory goodness.
Optional ingredients for added flavor
To elevate your Pear & Apple Grilled Cheese, consider adding these flavor boosters:
- Turkey Bacon or Chicken Ham: Adds a savory crunch.
- Honey or Fig Jam: A drizzle can enhance sweetness and create a delightful contrast to the cheese.
- Nuts: Chopped walnuts or pecans can offer a satisfying crunch.
- Herbs: A sprinkle of fresh thyme or rosemary can add an aromatic touch.
Experiment with these optional additions, and visit sources like The Spruce Eats for inspiration on layering flavors in gourmet grilled cheeses!
Enhancing your grilled cheese with these delicious ingredients will not only make your meal more satisfying but might even turn it into a dinner party favorite! What’s your ideal twist on this classic dish?
Step-by-Step Preparation of Pear & Apple Grilled Cheese
Creating an indulgent Pear & Apple Grilled Cheese With Caramelized Onions is an adventure that will tantalize your taste buds. Whether you’re winding down after a long day or hosting friends for brunch, this dish guarantees satisfaction. Let’s dive into the process!
Gather Your Kitchen Equipment
Before starting, it’s essential to round up your kitchen tools. Having everything at your fingertips makes cooking smoother and more enjoyable. Here’s what you’ll need:
- A non-stick skillet or grill pan
- A spatula
- A sharp knife for slicing
- A cutting board
- A mixing bowl
- A small saucepan (for caramelizing onions)
- A serving plate
Having your equipment ready not only streamlines your cooking process but also saves you from the unnecessary stress of misplacing items—something we all can relate to when in the heat of the moment!
Caramelizing the Onions to Perfection
Caramelized onions are the heart of this dish, adding a depth of flavor that will have everyone asking for seconds. Here’s how to get them just right:
-
Slice your onions thinly. A mandoline is great if you have one, but a sharp knife will do just fine.
-
Heat a tablespoon of olive oil or butter in your small saucepan over medium heat.
-
Add the onions, stirring to coat them in oil.
-
Season with a pinch of salt. This helps to draw out moisture. Now, patience is key! Reduce the heat if necessary to prevent burning, and let the onions cook for around 20-30 minutes. Stir occasionally.
-
Optional: For a bit of sweetness, consider adding a teaspoon of brown sugar or balsamic vinegar during the last few minutes of cooking. This will enhance the natural sweetness of the onions, creating that caramelized goodness we all love.
Caramelized onions are an art form, and practiced cooks recommend checking out this guide on perfect caramelization.
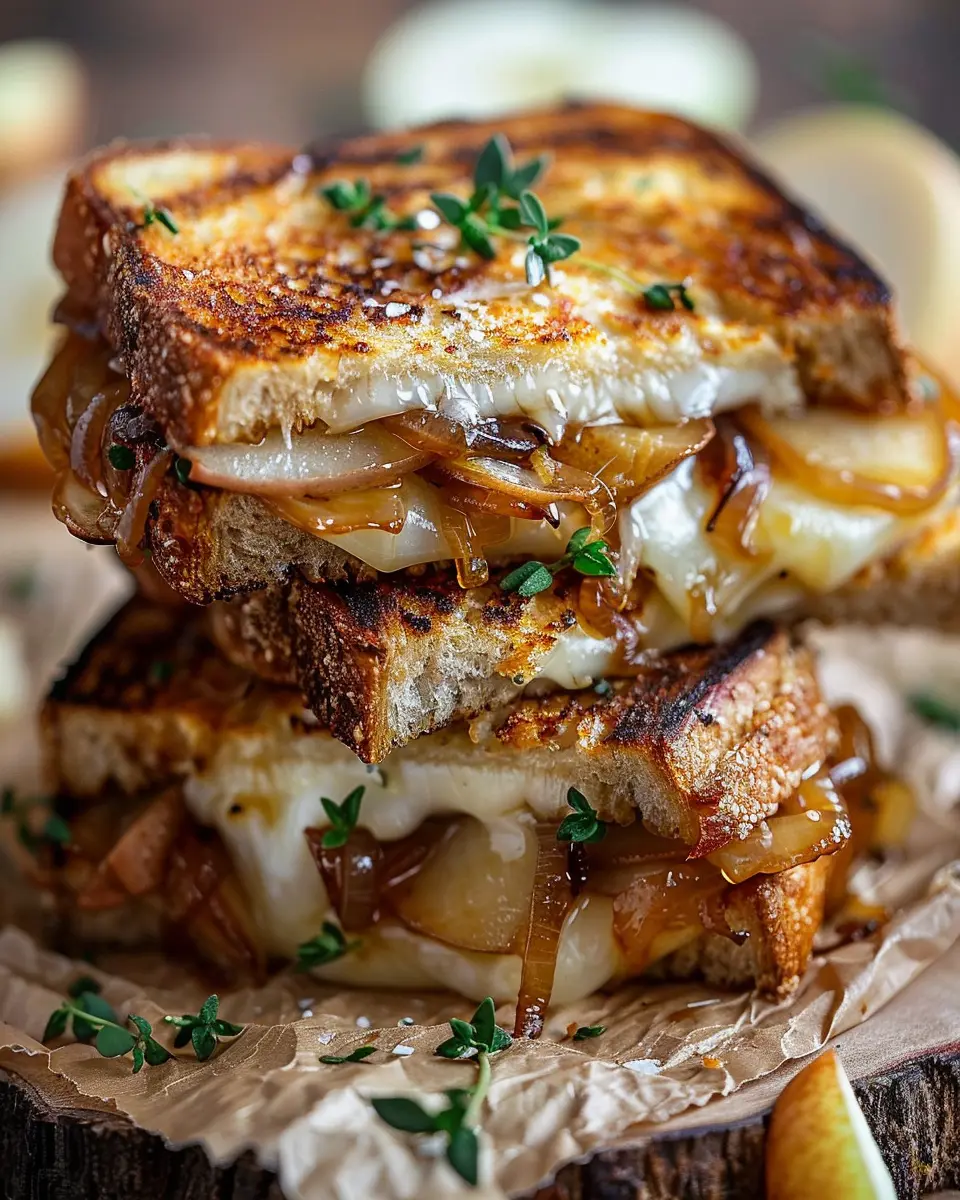
Crafting the Layers of Your Pear & Apple Grilled Cheese
Once your onions are beautifully caramelized, it’s time to start building that Pear & Apple Grilled Cheese. Here’s a quick overview for layering:
-
Choose your bread: Sourdough or whole grain works wonderfully and provides a robust base.
-
Start with a layer of cheese. A creamy brie or sharp cheddar complements the sweetness of the fruits beautifully.
-
Next, add your pears and apples. Thinly slice them to ensure even layering and a good melt.
-
Top with the caramelized onions. Don’t be shy—this is the star of the show!
-
Finally, add another slice of cheese on top, and crown it with a second slice of bread to hold everything together.
Layering is key in creating that gooey, melty experience we all crave from grilled cheese!
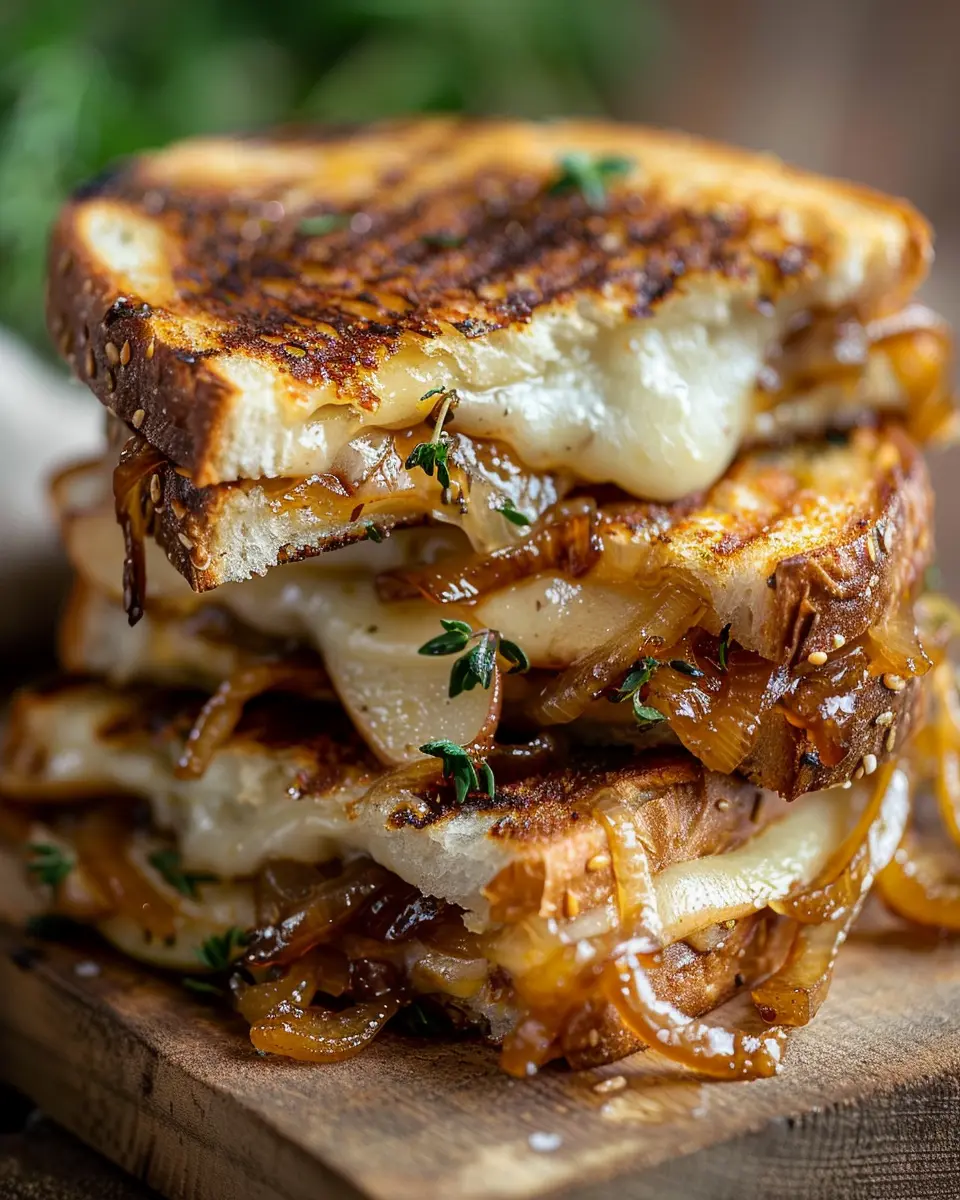
The Grilling Process
Now for the crucial part: grilling your sandwich. This step is simple yet essential to achieving the ultimate crispiness:
-
Heat your non-stick skillet over medium heat.
-
Spread butter or a light drizzle of olive oil on the outside of the bread slices (this will help achieve the perfect golden crust).
-
Place the sandwich in the skillet: Grill for 4-5 minutes on one side, or until golden brown.
-
Flip and repeat. Keep an eye on the color—if it’s browning too quickly, lower the heat. We want that cheese melting beautifully without burning the bread.
A piece of advice: Once flipped, you can cover the skillet with a lid to trap heat and expedite the melting process.
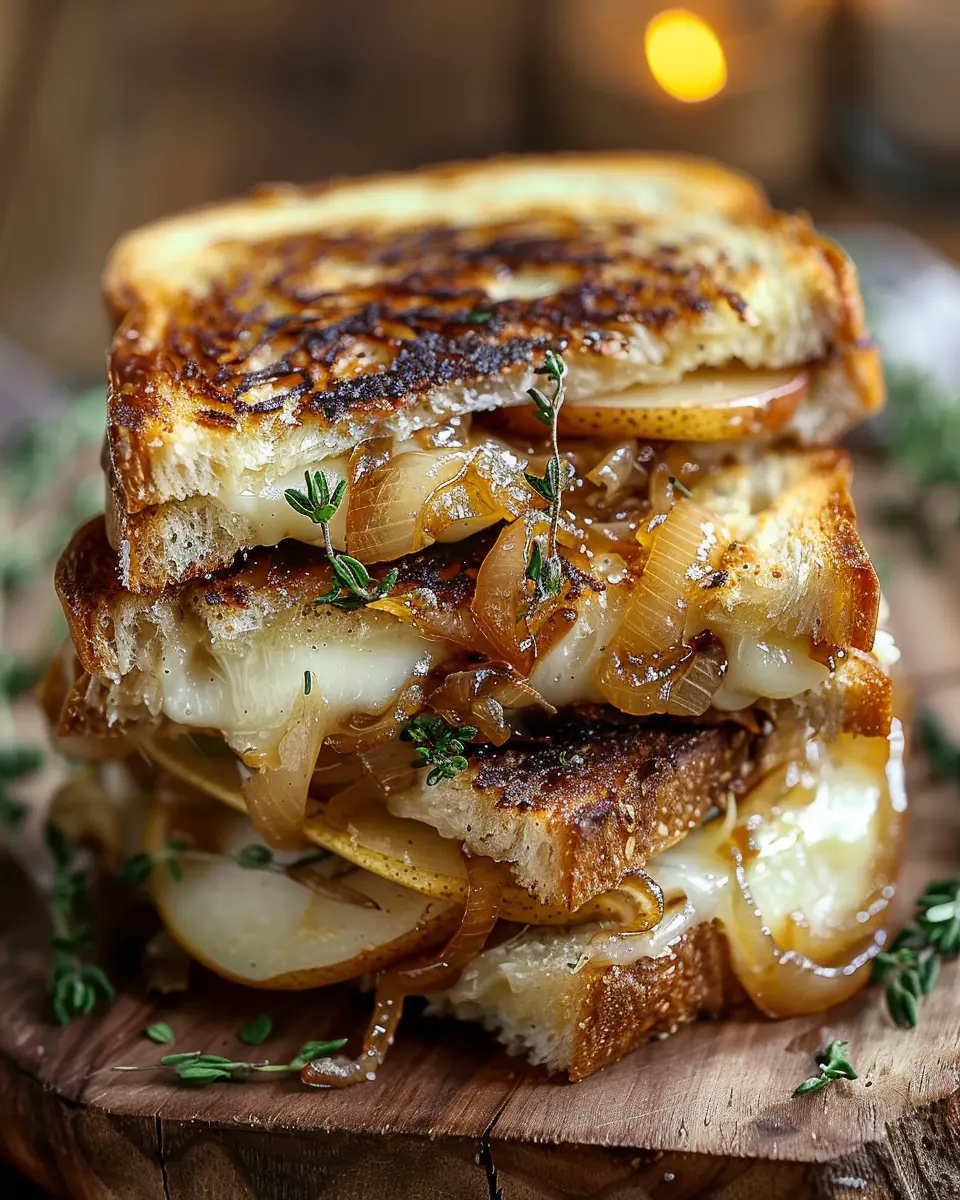
Serving Your Masterpiece
Once your Pear & Apple Grilled Cheese is beautifully grilled to perfection, it’s time to serve!
-
Use a sharp knife to cut it diagonally—this is not only aesthetically pleasing but also makes it easier to eat.
-
Serve with a side salad or some sweet potato fries for a complete meal.
For an even more gourmet flair, consider drizzling a touch of honey or balsamic reduction on top before serving.
Gather your friends, pour a sparkling beverage or some fresh-pressed cider, and indulge in this heavenly creation. Bon appétit!
With this step-by-step guide, you’ll no longer view grilled cheese as just a childhood favorite; it’s a delightful culinary experience waiting to happen!
Variations of Pear & Apple Grilled Cheese
Grilled cheese sandwiches have come a long way from their classic roots, and our Pear & Apple Grilled Cheese with Caramelized Onions opens the door to a delicious world of variations. Why stick to just one when you can explore different flavor profiles?
Spicy Pear & Apple Grilled Cheese
If you’re a fan of a little heat, try adding some spicy elements to your Pear & Apple Grilled Cheese. Just sprinkle in some crushed red pepper flakes or jalapeño slices while you’re grilling. The sweetness of the pears and apples pairs beautifully with the spiciness, creating a delightful contrast that will tantalize your taste buds. You might just discover your new favorite flavor combination!
Heartier Pear & Apple Grilled Cheese with Turkey Bacon
For those looking to add some protein, consider incorporating turkey bacon into your Pear & Apple Grilled Cheese. The crispy texture and smoky flavor of turkey bacon complement the fruity elements and caramelized onions perfectly. Simply cook the turkey bacon in a skillet until crispy, then layer it between your cheese and fruit before grilling. This adds an extra dimension of flavor and keeps you feeling full longer.
Vegan Variation of Pear & Apple Grilled Cheese
Plant-based friends, don’t worry; you can join in the fun too! Swap out the cheese for your favorite non-dairy variety—coconut or cashew cheese work wonders. Use whole-grain or gluten-free bread to keep it vegan-friendly. Sauté the onions in a little olive oil instead of butter for that same caramelized goodness. This variation is not only dairy-free but also packed with flavor and nutrients.
No matter which variation you choose, your Pear & Apple Grilled Cheese adventure is sure to impress. Explore these tasty options and share your favorites with friends! And if you’re curious about more sandwich ideas, check out Serious Eats for inspiration.
Cooking Tips and Notes for Pear & Apple Grilled Cheese
Tips for Perfect Caramelized Onions
Achieving perfectly caramelized onions is an art. Start by slicing them thinly to ensure they cook evenly. Use a mix of olive oil and butter for richness and flavor. Maintain a low to medium heat and be patient—this process can take 20-30 minutes. Stir occasionally, allowing the onions to slowly transform into a sweet, golden brown treat. A touch of broth or fresh apple juice during cooking can enhance their sweetness. Check out this caramelization guide for deeper insights.
Best Bread Choices
When crafting your Pear & Apple Grilled Cheese, the bread you choose is crucial. Look for hearty options like sourdough or whole grain that can hold up to the fillings. These choices not only add texture but also complement the sweetness of the pears and apples brilliantly.
Cheese Recommendations
The cheese is the heart of your grilled cheese! Try sharp cheddar for a delightful contrast or creamy brie for a richer taste. For a unique twist, consider using gouda, which melts beautifully and adds a nutty flavor that pairs well with both pears and apples. Don’t be afraid to experiment! A blend of cheeses can create a flavor profile that’s simply irresistible.
Serving Suggestions for Pear & Apple Grilled Cheese
Perfect pairings for your grilled cheese
When enjoying your Pear & Apple Grilled Cheese with Caramelized Onions, you want to enhance those delightful sweet and savory flavors. Try a simple arugula salad drizzled with balsamic vinaigrette to bring a peppery kick that perfectly complements the dish. If you’re in the mood for something heartier, opt for a side of sweet potato fries, baked or air-fried, adding a lovely crunch.
If you want to make it extra cozy, consider serving it up with some deliciously spiced apple cider. The warmth and sweetness of the cider ties in beautifully with the flavors of your grilled cheese, making for a light yet satisfying meal.
Creative side dishes to complete your meal
To round out your dining experience, how about some roasted veggies? They add color and healthy crunch, plus they’re super easy to make! A tangy pear and walnut salad could also be a lovely complement, marrying flavors without overwhelming the palate.
Want to explore more pairings? Check out this guide to perfect salad companions for inspiration!
Time Breakdown for Pear & Apple Grilled Cheese
Preparation Time
Getting ready for your Pear & Apple Grilled Cheese is half the fun! You’ll need about 15 minutes to gather your ingredients, slice your fruits, and chop those delicious onions. If you’ve got a busy schedule, prepping ahead can save you precious time later—chop your fruits and onions the night before!
Cooking Time
The cooking process is where the magic happens! Expect to spend around 20 minutes sautéing the onions until they’re beautifully caramelized and grilling your sandwich to golden perfection. This hands-on part is where the sweet and savory flavors come alive!
Total Time
In total, you’re looking at about 35 minutes from start to finish. Perfect for a quick weeknight dinner or a relaxed weekend lunch. Isn’t it wonderful to whip up such a gourmet grilled cheese in less than an hour? For some more inspiration, check out Food Network for more delicious recipes. Enjoy every bite!
Nutritional Facts for Pear & Apple Grilled Cheese
When craving a gourmet twist on a classic comfort food, the Pear & Apple Grilled Cheese with Caramelized Onions is a fantastic choice. Not only is it delicious, but here’s a sneak peek into its nutritional profile!
Calories
This scrumptious sandwich clocks in at around 450 calories. Perfect for a satisfying lunch or a cozy dinner, it manages to balance indulgence with nourishment.
Protein
With approximately 15 grams of protein, this dish packs a decent punch to keep you feeling full and energized throughout your day. Pair it with a side salad for a nutrient-rich meal!
Sodium
The sodium content is about 700 milligrams, making it reasonably moderate. For a healthier version, consider opting for low-sodium cheese and bread. You’ll enjoy that sweet and savory blend without compromising on your dietary goals.
For more nutritional insights, check out the USDA’s Nutritional Database. Understanding what goes into your meals can make a big difference in your overall health!
FAQs about Pear & Apple Grilled Cheese
Can I make this grilled cheese in advance?
Absolutely! Preparing your Pear & Apple Grilled Cheese ahead of time can save you valuable moments, especially during busy weekdays. To do this, assemble your sandwich and grill it until it’s golden brown. Allow it to cool completely, then wrap it tightly in plastic wrap or store it in an airtight container. When you’re ready to enjoy, simply reheat it in a skillet over medium heat or in a toaster oven. Just be mindful that the texture may differ slightly upon reheating, but it’ll still be delicious!
What can I substitute for sharp cheddar cheese?
If sharp cheddar isn’t available or if you’re seeking a different flavor profile, there are several delicious alternatives for your Pear & Apple Grilled Cheese. Opt for:
- Gruyère: This cheese offers a creamy texture with a slightly nutty flavor that pairs beautifully with pears.
- Fontina: With its meltability, Fontina maintains a rich flavor that complements the sweetness of apples.
- Havarti: A milder cheese, Havarti will provide a smooth texture and a buttery taste that is delightful in sandwiches.
By mixing in your favorite cheeses, you can create a gourmet twist on this classic dish.
How do I store leftover grilled cheese?
Leftover Pear & Apple Grilled Cheese can be stored with ease! If you have a half-eaten sandwich, wrap it in foil or place it in an airtight container and refrigerate it. It’s best to consume it within 2–3 days for the best flavor and texture. When you’re ready to enjoy your leftovers, reheat it on the stovetop for that crispy crust that makes grilled cheese so irresistible. If you’d like tips on how to reheat grilled cheese without making it soggy, check more recipes here.
Remember, this melty delight can brighten up any day, so don’t hesitate to whip up this delightful combination!
Conclusion on Pear & Apple Grilled Cheese
Why you should try this recipe today!
If you’re looking for a unique twist on a classic comfort food, the Pear & Apple Grilled Cheese is a must-try! This delightful dish combines the sweetness of fresh fruit with the creaminess of cheese, creating a flavor explosion that’s both nostalgic and innovative. It’s perfect for a cozy night in or a casual meal with friends.
Imagine savoring the gooey, melty layers of cheese paired with caramelized onions and the crunchy textures of pears and apples. Plus, it’s quick to make and requires minimal ingredients. Why not elevate your grilled cheese experience today? Dive into this delicious recipe and impress your taste buds!
For more inspiration, check out this article on creative grilled cheese variations or explore healthy eating tips to pair with your delightful dish.
PrintPear & Apple Grilled Cheese: The Indulgent Twist You Need

A delightful twist on the classic grilled cheese, incorporating the sweet flavors of pears and apples, topped with caramelized onions.
- Prep Time: 10 minutes
- Cook Time: 15 minutes
- Total Time: 25 minutes
- Yield: 2 sandwiches
- Category: Lunch
- Method: Grilling
- Cuisine: American
- Diet: Vegetarian
Ingredients
- 2 slices whole grain bread
- 1 tablespoon butter
- 1/2 cup shredded sharp cheddar cheese
- 1/2 cup shredded Gruyère cheese
- 1/2 pear, thinly sliced
- 1/2 apple, thinly sliced
- 1/2 medium onion, thinly sliced
- 1 tablespoon honey
- 1 teaspoon balsamic vinegar
Instructions
- In a skillet over medium heat, melt 1 tablespoon of butter and add the sliced onion. Cook until soft and caramelized, about 10 minutes.
- Spread butter on one side of each slice of bread.
- On the non-buttered side, layer the cheeses, pear slices, and apple slices.
- Add the caramelized onions on top.
- Top with the second slice of bread, buttered side facing out.
- Cook in the skillet over medium heat until golden brown, about 3-4 minutes per side.
Notes
- For extra flavor, drizzle honey and balsamic vinegar on the cheese layer before adding the onions.
- This sandwich pairs well with a side salad.
Nutrition
- Serving Size: 1 sandwich
- Calories: 400
- Sugar: 10g
- Sodium: 500mg
- Fat: 20g
- Saturated Fat: 10g
- Unsaturated Fat: 8g
- Trans Fat: 0g
- Carbohydrates: 40g
- Fiber: 4g
- Protein: 15g
- Cholesterol: 30mg

")