
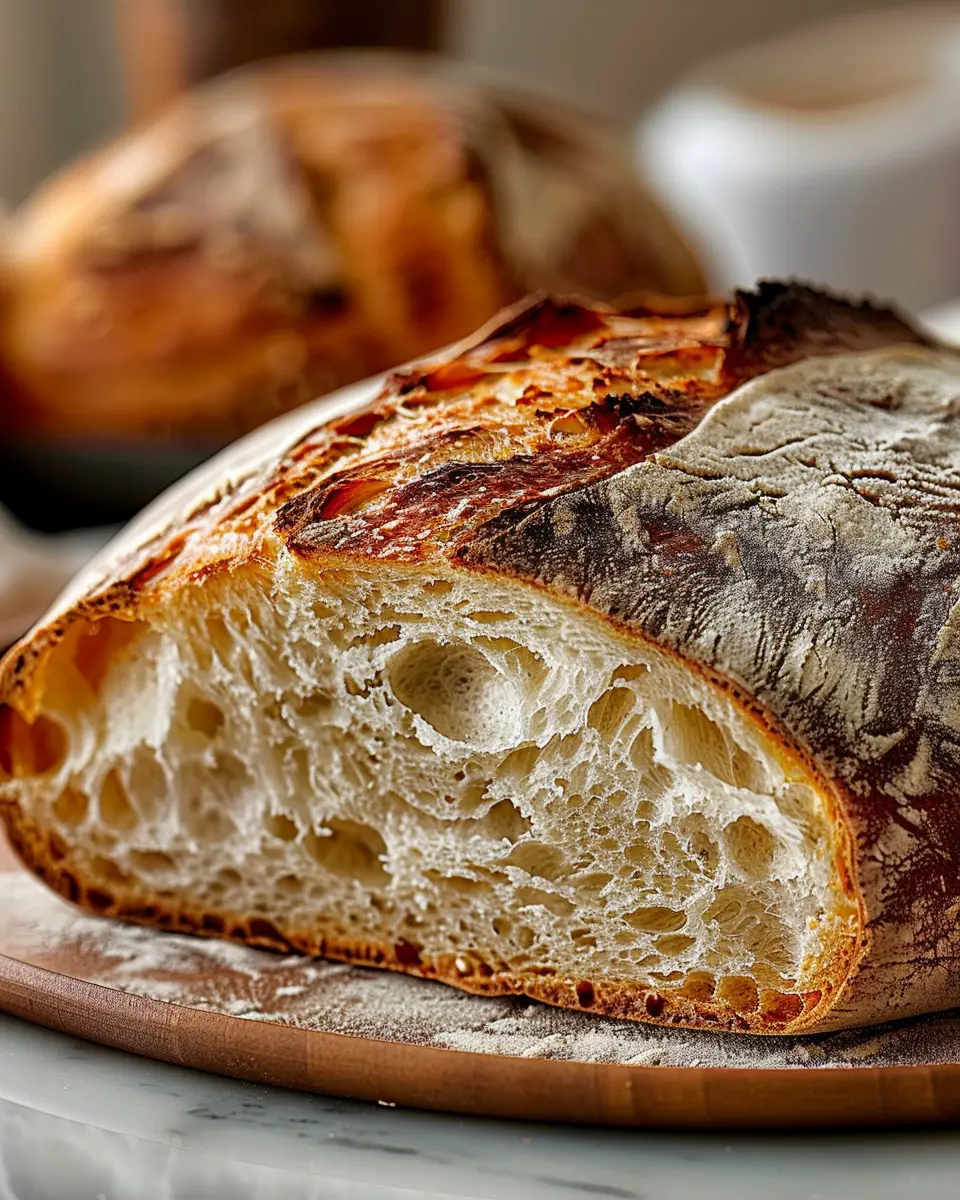
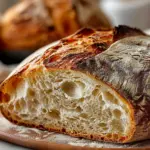
Introduction to Crusty Golden Sourdough Bread
There’s something truly magical about the aroma of freshly baked bread wafting through your kitchen. Among the myriad of bread options, crusty golden sourdough bread holds a special place in hearts (and stomachs) all around the world. But what exactly makes sourdough so beloved?
Why is sourdough bread so beloved?
Sourdough bread’s charm comes from its unique flavor profile and texture. Unlike its store-bought counterparts, sourdough offers a delightful tanginess paired with a chewy interior and a crispy crust. This is mainly thanks to the natural fermentation process, which not only develops complex flavors but also lends beneficial probiotics that promote gut health. Studies show that eating fermented foods can aid digestion and boost your immunity—great news for those of us navigating busy lifestyles!
Moreover, sourdough bread is incredibly versatile. Whether you’re spreading a luscious avocado on a slice for breakfast or creating an elegant bruschetta for your next gathering, sourdough shines in every scenario. As you master the art of crafting a crusty golden sourdough bread, you’ll discover that it’s not just a recipe; it’s a skill. And what’s better than impressing your friends with a loaf that you created from scratch?
There’s a certain joy that comes from the slow fermentation process, where patience is key. As the dough bubbles and rises, you become intimately involved in its transformation, forging a connection to centuries of baking tradition. For thousands of years, people have relied on sourdough for sustenance and comfort, making it a timeless staple.
If you’re new to baking or looking to up your bread game, fear not! We’ll guide you step-by-step through making your very own loaf. You’ll be surprised by how achievable a crusty golden sourdough bread is with a bit of practice and dedication.
So, are you ready to embark on this delicious journey? Dust off your apron, grab your mixing bowl, and let’s dive into the world of sourdough baking! For a deeper dive into the science and history behind bread-making, check out this article on sourdough fermentation.
Ingredients for Crusty Golden Sourdough Bread
Creating a crusty golden sourdough bread involves selecting the right ingredients to achieve that perfect texture and flavor. Let’s break down what you’ll need:
- Flour: Use bread flour for its high protein content, which helps develop gluten and gives the bread structure.
- Water: Ideally filtered or bottled water at room temperature is best for combining with the flour and yeast.
- Sourdough Starter: A lively, active sourdough starter is essential. It provides the natural yeast needed for fermentation. If you’re unsure how to create one, check out our guide here.
- Salt: Sea salt or pink Himalayan salt adds flavor and strengthens the dough.
- Optional Ingredients: You can enhance your crusty golden sourdough bread with seeds, herbs, or even a touch of honey for a slightly sweet profile.
The magic of sourdough lies in its simplicity; each ingredient plays a vital role in creating a loaf that’s crusty on the outside and soft on the inside. Ready to dive into the baking process? Your kitchen will soon be filled with an irresistible aroma! Find more baking tips on King Arthur Baking.
Step-by-Step Preparation of Crusty Golden Sourdough Bread
Making your own crusty golden sourdough bread is not just an activity; it’s a rewarding culinary adventure that transforms simple ingredients into a delightfully complex loaf that bursts with flavor. Let’s explore each step together, ensuring you grasp the beauty of this age-old craft.
Combine the ingredients
Start by gathering your essential ingredients:
- 500g bread flour
- 350g water (at about 80°F)
- 100g sourdough starter (fed and bubbly)
- 10g salt
In a large mixing bowl, combine the flour and water, stirring until no dry bits remain. This step is fundamental as it hydrates the flour, setting the stage for gluten development later on. Once combined, add your sourdough starter and salt. A good rule of thumb is to keep the salt separate from the starter initially to avoid inhibiting yeast activity. Mix everything together until it forms a rough dough.
Resting the dough
After combining, it’s essential to let your dough rest. Cover the bowl with a damp cloth or plastic wrap and let it sit for about 30 minutes. This initial waiting period, known as autolyse, allows the flour to fully absorb the water and starts to develop the gluten, which is crucial for that chewy texture we love.
Stretch and fold technique
Now comes the fun part! After your dough has rested, you’ll want to perform the stretch and fold technique. Lightly flour your work surface and transfer the dough. Gently stretch one side of the dough up and fold it over to the opposite side. Turn the bowl a quarter turn and repeat this process until you’ve gone around the bowl four times.
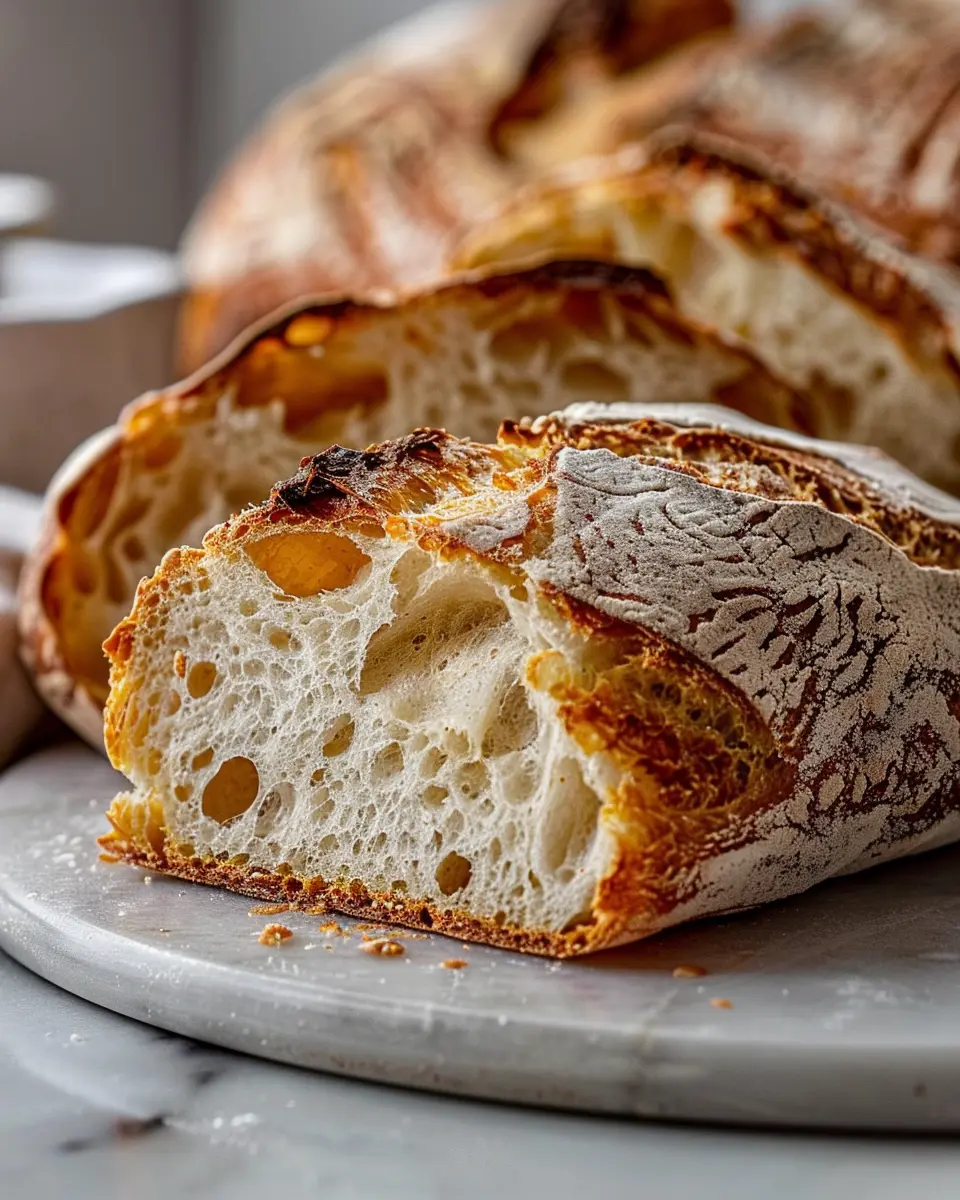
This technique is vital because it strengthens the dough’s structure without the need for intensive kneading. It also helps incorporate air, leading to that lovely open crumb we all desire in our crusty golden sourdough bread.
Shaping the dough
Once your dough has risen and has a lovely, elastic texture, it’s time to shape it. Carefully flip the dough onto a lightly floured surface. Gently pat it down to release any excess air. Then, fold the edges into the center to form a loose ball. Flip it seam-side down and use your hands to create tension on the surface by rotating it against the work surface. This technique creates a beautiful skin that will hold its shape during the final proof.
Proofing the bread
After shaping, it’s crucial to let your dough rise again. Place it seam-side up in a well-floured proofing basket or bowl lined with a kitchen towel. Cover the dough and let it proof for about 2 to 4 hours at room temperature or in the refrigerator overnight for a longer fermentation, which enhances the flavor.
Proofing develops the final structure of your crusty golden sourdough bread, giving it that charming artisan touch. Did you know that sourdough fermentation can make the bread easier to digest? It’s a win-win situation!
Baking in a Dutch oven
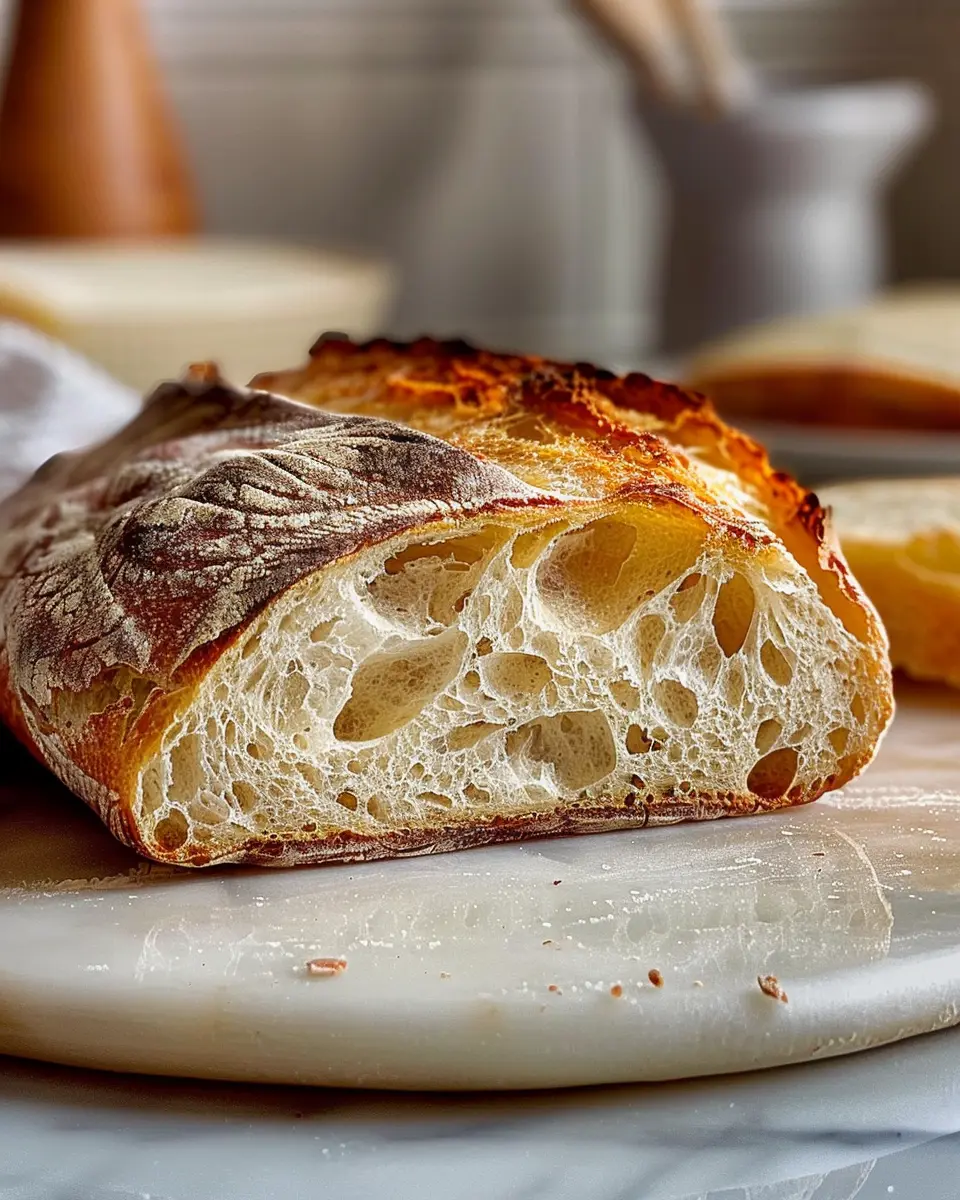
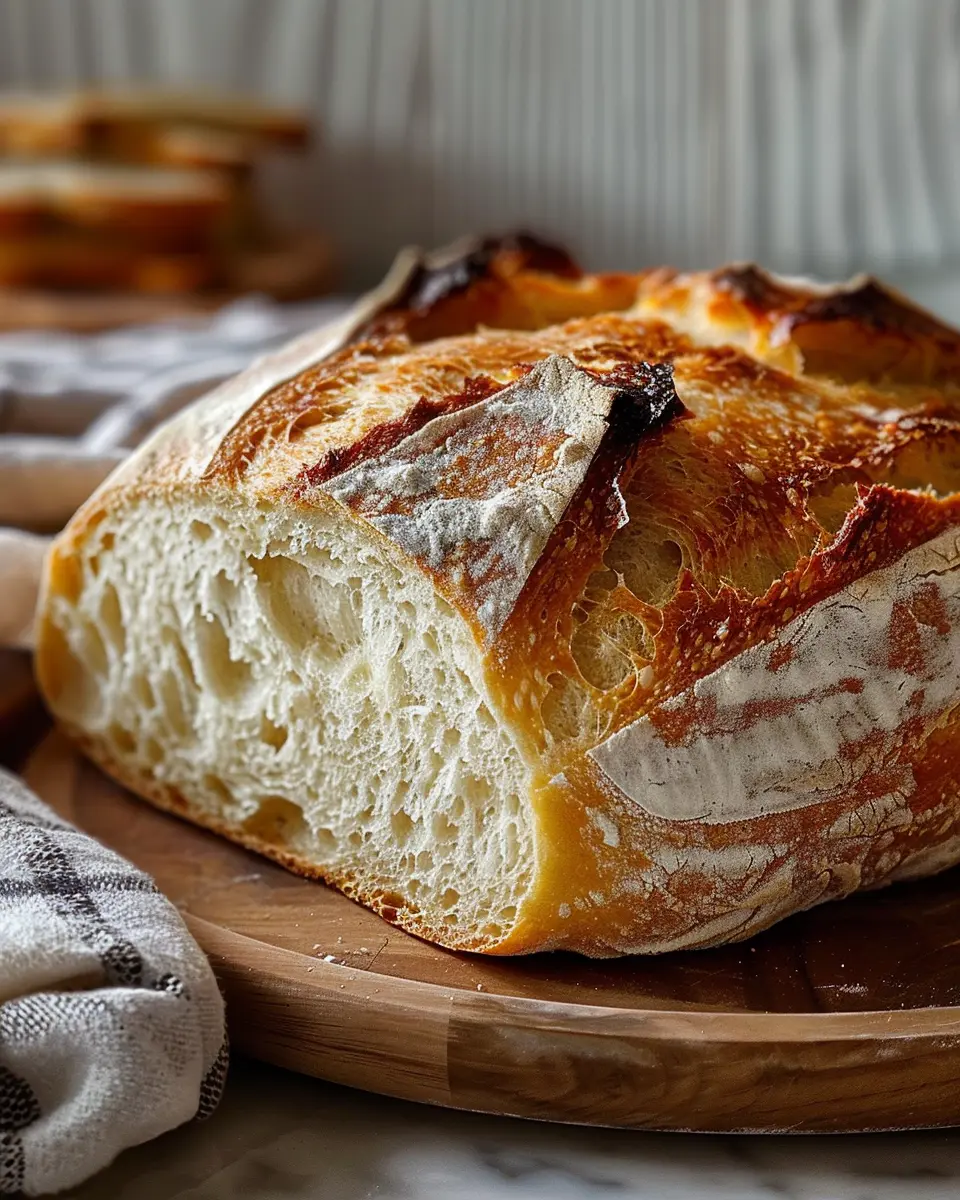
Finally, it’s time for the grand finale—baking! Preheat your oven to 450°F (232°C) with a Dutch oven inside for at least 30 minutes. Once hot, carefully remove the Dutch oven and place your dough in it, using parchment paper to transfer it easily. Cover with the lid and bake for 30 minutes.
After that, remove the lid and bake for an additional 15 minutes to achieve that irresistible golden crust. The steam created in the Dutch oven is key to that famous crispy crust. Once it’s done, let your crusty golden sourdough bread cool on a wire rack.
With these steps, you’ll experience the joy of making this timeless bread, and who knows, it might just become your most cherished tradition! For more tips, check out resources from King Arthur Baking or The Perfect Loaf. Happy baking!
Variations of Crusty Golden Sourdough Bread
Adding Herbs and Spices
If you’re feeling adventurous with your crusty golden sourdough bread, why not infuse it with herbs and spices? Adding ingredients like rosemary, thyme, or even a pinch of garlic powder can create an aromatic loaf that elevates simple meals into something special. A touch of crushed red pepper can give your bread a delightful kick, perfect for pairing with soups or stews. When you’re mixing your dough, try incorporating about one tablespoon of dried herbs per loaf—experiment to find your perfect blend!
For a delightful twist, consider making a savory herb butter to slather on warm slices. Imagine enjoying a slice of bread with a bit of rosemary butter while sipping your favorite herbal tea!
Experimenting with Whole-Grain Flours
Another fantastic way to enhance your crusty golden sourdough bread is by experimenting with whole-grain flours. Whole wheat, spelt, or even rye flour can add depth and complexity to your bread’s flavor and texture. Each flour has unique properties, influencing hydration levels, crust formation, and even nutritional benefits. For instance, whole wheat flour can enhance the bread’s fiber content, making it a healthier choice.
Consider starting with a blend—perhaps 50% all-purpose flour and 50% whole wheat flour, gradually increasing the whole grain over time as you develop your palate. Tracking your variations can even turn into a fun journal project, noting taste and texture changes and discovering what works best for you.
The journey of bread-making is one of discovery and creativity. So why not dive in and start your sourdough adventure today? Your kitchen awaits!
Cooking Tips and Notes for Crusty Golden Sourdough Bread
Making crusty golden sourdough bread at home is an art, and a few tips can help you perfect it.
Master the Dough
- Hydration Matters: Higher hydration levels lead to a more open crumb structure. Experiment with adding a little extra water to your dough.
- Kneading Technique: Don’t skip the stretch-and-fold technique during bulk fermentation; it improves gluten structure without intense kneading.
Rise to the Occasion
- Temperature Control: The ideal proofing temperature is around 75°F (24°C)—it allows yeast activity to flourish. If your kitchen is cool, consider using the turned-off oven as a warm spot.
- Knowing When to Bake: Properly proofed dough should spring back slightly when gently poked. This is an essential visual cue for a perfect bake.
Bake with Precision
- Preheat Your Dutch Oven: This helps achieve that coveted crust. A well-preheated pot mimics a traditional bakery’s steam oven.
- Steam it Up: If you don’t have a Dutch oven, create steam in your oven by placing a pan of hot water at the bottom during baking.
For deeper insights, visit The Perfect Loaf or check out the American Bakers Association for community tips and resources. Happy baking!
Serving Suggestions for Crusty Golden Sourdough Bread
If you’re thinking about how to enjoy your crusty golden sourdough bread, you’re in for a treat! This bread is incredibly versatile and pairs beautifully with various toppings and sides.
Perfect Pairings
-
Breakfast Delight: Toast a slice and layer on some cream cheese with fresh herbs for a quick morning bite. Add turkey bacon for extra protein and flavor, creating a satisfying start to the day.
-
Savory Sandwiches: Use this bread as a sturdy base for sandwiches. Spread a hint of Dijon mustard, add slices of chicken ham and your favorite greens for a lunch that packs a flavor punch.
-
Gourmet Grilled Cheese: For a cozy evening, try making a grilled cheese using sharp cheddar and a hint of garlic butter on the outside of your crusty golden sourdough bread.
-
Perfect Dips: Serve this bread alongside your favorite dips like hummus or a tangy spinach-artichoke blend. It’s great for sharing and perfect for gatherings!
For tips on how to pair your bread creatively, check out the Food Network for inspiration! Enjoy making memorable meals with your crusty golden sourdough bread!
Time Breakdown for Crusty Golden Sourdough Bread
Preparation Time
Making crusty golden sourdough bread starts with about 30 minutes of preparation. Gather your ingredients, whip up the dough, and don’t forget to activate your starter! This step is crucial for adding that distinct sour flavor.
Proofing Time
After mixing your dough, you’ll need to let it proof for about 4 to 6 hours. During this stage, the dough will rise and develop flavor. Keep an eye on it; a warm kitchen will speed up the process.
Baking Time
Once your dough has properly risen, preheat your oven and bake it for approximately 30 to 35 minutes. This is where the magic happens, transforming your dough into that amazing crusty loaf we all crave.
Total Time
In total, you’re looking at roughly 5 to 7 hours, but most of that is hands-off time while the dough does its thing. Just imagine the satisfaction of slicing into a warm loaf later! For more in-depth tips on sourdough baking, check out King Arthur Baking for expert insights.
Happy baking!
Nutritional Facts for Crusty Golden Sourdough Bread
When it comes to indulging in the delightful experience of crusty golden sourdough bread, it’s a good idea to know what’s in it. Here’s a quick look at the nutritional profile of this beloved loaf.
Calories
A standard slice of crusty golden sourdough bread contains approximately 80-100 calories. This makes it an excellent addition to your meal without overwhelming your daily intake.
Protein
Each slice packs about 2-3 grams of protein. While it’s not a complete protein source, it can still help you meet your daily needs when paired with other protein-rich foods like Turkey Bacon or Chicken Ham.
Sodium
Typically, a slice holds around 150-200 mg of sodium. This is relatively moderate, allowing you to enjoy your bread guilt-free. Just keep in mind to balance it with fresh ingredients and low-sodium options in your meals.
For more insights into understanding bread nutrition, check out the Whole Grains Council. They provide great resources on the benefits of consuming whole grains like sourdough!
FAQs about Crusty Golden Sourdough Bread
What makes sourdough bread unique?
Sourdough bread is special due to its natural fermentation process, which relies on wild yeast and lactic acid bacteria from your starter. This not only gives it a tangy flavor but also contributes to its chewy texture and impressive crust. Unlike breads made with commercial yeast, the slow fermentation allows for deeper flavor development and easier digestibility. Curious about the science? Check out this article on fermentation.
Can I use all-purpose flour instead of bread flour?
Absolutely! While bread flour contains a higher protein content that helps create a chewier texture, all-purpose flour can still yield a delicious crusty golden sourdough bread. The trade-off may be slight variations in texture and rise, but you’ll still enjoy a lovely loaf. If you’re experimenting, it may be helpful to blend the two for the best of both worlds.
How do I know when my dough has risen properly?
Visual cues are your best friend here. Allow your dough to rise until it has doubled in size and passes the “poke test”—gently poke it, and if it springs back slowly, it’s ready. If it holds the poke without springing back, you might be approaching over-proofing. Don’t underestimate the aesthetic joy of working with your dough; it can be a rewarding experience to get to know its characteristics!
What should I do if my sourdough starter isn’t bubbling?
A sluggish starter might need a little TLC. Ensure it’s being fed with fresh flour and water, and maintain a warm environment, ideally around 75°F to 85°F. If you’re using whole grain flour, this can help boost the activity due to its higher nutrient content. If it’s still not bubbling after a few feedings, you might need to consider starting a new one. Check out this guide on reviving a starter for helpful tips!
Exploring sourdough bread is a journey filled with learning; don’t hesitate to embrace trial and error as part of the fun. Enjoy your baking adventure!
Conclusion on Crusty Golden Sourdough Bread
Ultimately, making crusty golden sourdough bread is both an art and a science. The satisfaction of kneading your dough, watching it rise, and finally pulling that golden loaf from the oven is unparalleled. Whether enjoyed fresh with a spread, or used in a hearty sandwich, this bread elevates any meal.
Keep experimenting with hydration levels and proofing times to find your ideal texture and flavor. Sourdough is forgiving; it adapts as much to your palate as it does to your environment. Remember, the journey of sourdough is as delightful as the destination. Join the thriving sourdough community and share your experiences—we’d love to hear your stories!
PrintCrusty Golden Sourdough Bread: The Best Homemade Delight
A delicious recipe for making your own crusty golden sourdough bread at home.
- Prep Time: 20 minutes
- Cook Time: 30 minutes
- Total Time: 3 hours 20 minutes
- Yield: 1 large loaf
- Category: Bread
- Method: Baking
- Cuisine: American
- Diet: Vegetarian
Ingredients
- 500 grams bread flour
- 350 ml water
- 100 grams sourdough starter
- 10 grams salt
Instructions
- Mix the bread flour and water in a bowl until there are no dry patches.
- Add the sourdough starter and salt, then mix until fully combined.
- Let the dough rest for about 30 minutes, then perform a series of stretch and folds.
- Allow the dough to ferment for several hours until it has doubled in size.
- Shape the dough and place it in a proofing basket.
- Let the dough rise for another hour before baking.
- Bake in a preheated oven until golden brown and crusty.
Notes
- For best results, use bread flour for a stronger structure.
- Make sure your sourdough starter is active before using.
Nutrition
- Serving Size: 1 slice
- Calories: 150
- Sugar: 0.5 grams
- Sodium: 200 grams
- Fat: 1 gram
- Saturated Fat: 0 grams
- Unsaturated Fat: 0 grams
- Trans Fat: 0 grams
- Carbohydrates: 30 grams
- Fiber: 2 grams
- Protein: 5 grams
- Cholesterol: 0 mg


")