
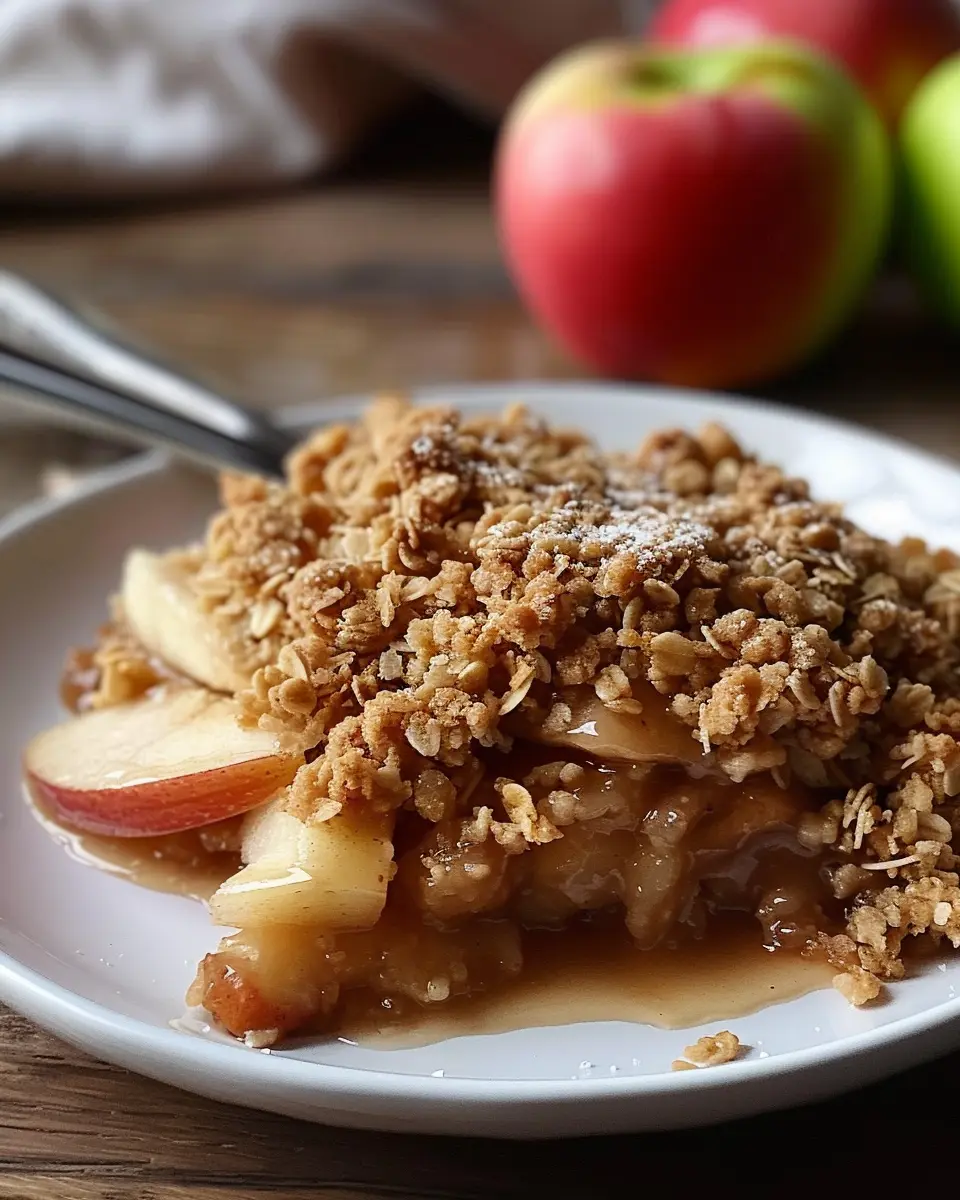
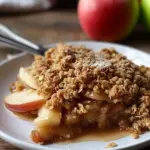
Introduction to Old-Fashioned Apple Crisp
When it comes to comfort food, few desserts evoke as much nostalgia as a steaming dish of old-fashioned apple crisp. This delightful dessert has a way of transporting us to simpler times—perhaps childhood kitchen memories mingling with the scent of cinnamon and baked apples. This classic treat combines sweet, tart apples with a buttery, crunchy topping, creating a harmony of flavors and textures that feels both familiar and comforting.
The Nostalgic Charm of Apple Crisp
Consider the last time you had a heartwarming slice of old-fashioned apple crisp. Did you share it with family during a holiday gathering, or perhaps enjoyed it as a cozy evening treat? The beauty of this dessert lies not just in its taste, but in the rich history and warmth it brings to our homes. According to the U.S. Apple Association, Americans consumed over 22 pounds of apples per person in 2021, proving that these versatile fruits hold a special place in our culinary hearts.
Apple crisp is also highly customizable, allowing you to tailor it to your personal tastes or dietary preferences. Whether you prefer sweet Fuji apples or tart Granny Smith, the choice is yours! The topping can be enhanced with ingredients like oats, nuts, or even a sprinkling of ginger to give it a unique twist.
Here’s a fun tip: you can experiment with adding spices to the apple filling, too! According to a study published by the American Institute for Cancer Research, enjoying fruits like apples can be part of a balanced diet that fights inflammation. So why not indulge in something that’s both delicious and has health benefits?
If you’re curious about exploring more fruit-based desserts, take a look at options like peach cobbler or berry crumble, which offer a similar satisfying combination of cooked fruit topped with a crunchy layer.
As you prepare to make your old-fashioned apple crisp, think about the memories it could create. Baking it for friends, serving it at family gatherings, or simply enjoying a quiet night at home can enhance those warm feelings of nostalgia. Prepare to dive into this classic recipe, and let the delightful aroma fill your kitchen, inviting everyone to gather around the table to enjoy a piece of comfort.
Ingredients for Old-Fashioned Apple Crisp
Essential ingredients for a delicious crisp
The foundation of an old-fashioned apple crisp lies in its simple yet satisfying ingredients. Here’s what you need:
- Fresh apples: Choose a mix of tart and sweet varieties, like Granny Smith and Honeycrisp, for a balanced flavor.
- Sugar: A bit of brown sugar adds rich sweetness and caramel notes.
- Cinnamon: This classic spice elevates the apple flavor, adding warmth to each bite.
- Oats: Old-fashioned rolled oats provide texture and heartiness to the topping.
- Butter: Use unsalted butter to give the crisp a rich, buttery flavor.
- Flour: All-purpose flour helps bind the topping and gives a golden finish.
Optional add-ins for a twist
Feel like experimenting? Here are some delightful add-ins:
- Nuts: Chopped walnuts or pecans add crunch and depth.
- Coconut flakes: A hint of coconut for a tropical twist.
- Dried fruit: Raisins or cranberries can introduce a chewy contrast.
- Maple syrup: Swap a part of the sugar for maple syrup for a unique sweetness.
For more tips and variations, check out this apple recipe guide. Whether you stick to the classic or jazz it up, this old-fashioned apple crisp is bound to be a crowd-pleaser at your next gathering.
Preparing Old-Fashioned Apple Crisp
Are you ready to indulge in a warm, delightful dessert that brings a sense of nostalgia? The old-fashioned apple crisp is the perfect treat that evokes memories of family gatherings and cozy evenings. Follow these simple steps, and you’ll have a mouthwatering dessert that is both easy and delicious.
Preheat the Oven
Before you dive into the fun part of the cooking process, it’s essential to preheat your oven to 350°F (175°C). This step ensures that your apple crisp will bake evenly and develop that golden-brown topping we all love. While the oven is heating, you can prepare the apples and the other ingredients. A good rule of thumb is to give your oven about 15-20 minutes to reach the perfect temperature.
Prepare the Apples
The star of this show is undoubtedly the apples. For the best flavors and textures in your old-fashioned apple crisp, choose a mix of sweet and tart apples like Fuji, Honeycrisp, or Granny Smith. Here’s how to prepare them:
- Wash: Rinse your apples under cool water to remove any dirt.
- Peel: Use a good vegetable peeler for smooth results.
- Slice and Core: Cut your apples into thin slices, removing the cores (about 1/4 inch thick works well).
You’ll need about 6 cups of sliced apples for this recipe. If you’re curious about different apple varieties and their flavor profiles, check out sites like Epicurious for in-depth guides.
Mix the Apple Filling
Now that your apples are prepped, it’s time to make a flavorful filling. In a large mixing bowl, combine:
- 1 cup granulated sugar (adjust based on apple sweetness)
- 1 tablespoon lemon juice
- 1 teaspoon ground cinnamon
- 1/4 teaspoon nutmeg (optional, but adds depth)
- A pinch of salt
Gently fold your sliced apples into this mixture until they’re well coated. Let it sit for about 10 minutes while you prepare the topping. This allows the flavors to marry beautifully, enhancing your old-fashioned apple crisp.
Create the Crumb Topping
The topping is what makes this dessert truly special. A perfectly crumbly texture is essential. In a medium bowl, mix together:
- 1 cup rolled oats
- 1 cup all-purpose flour
- 1 cup packed brown sugar
- 1/2 cup cold unsalted butter, cut into small pieces
- 1/2 teaspoon baking powder
- A sprinkling of salt
Use your fingers or a pastry cutter to blend everything until the mixture resembles coarse crumbs. You want some larger chunks for texture, but overall, it should be crumbly. If you prefer more crunch, consider adding some chopped nuts like pecans or walnuts to the mix.
Assemble and Bake
Now comes the exciting part—putting everything together! In a greased 9×13 inch baking dish, layer your apple filling on the bottom. Then sprinkle your crumb topping generously over the apples, ensuring even coverage.
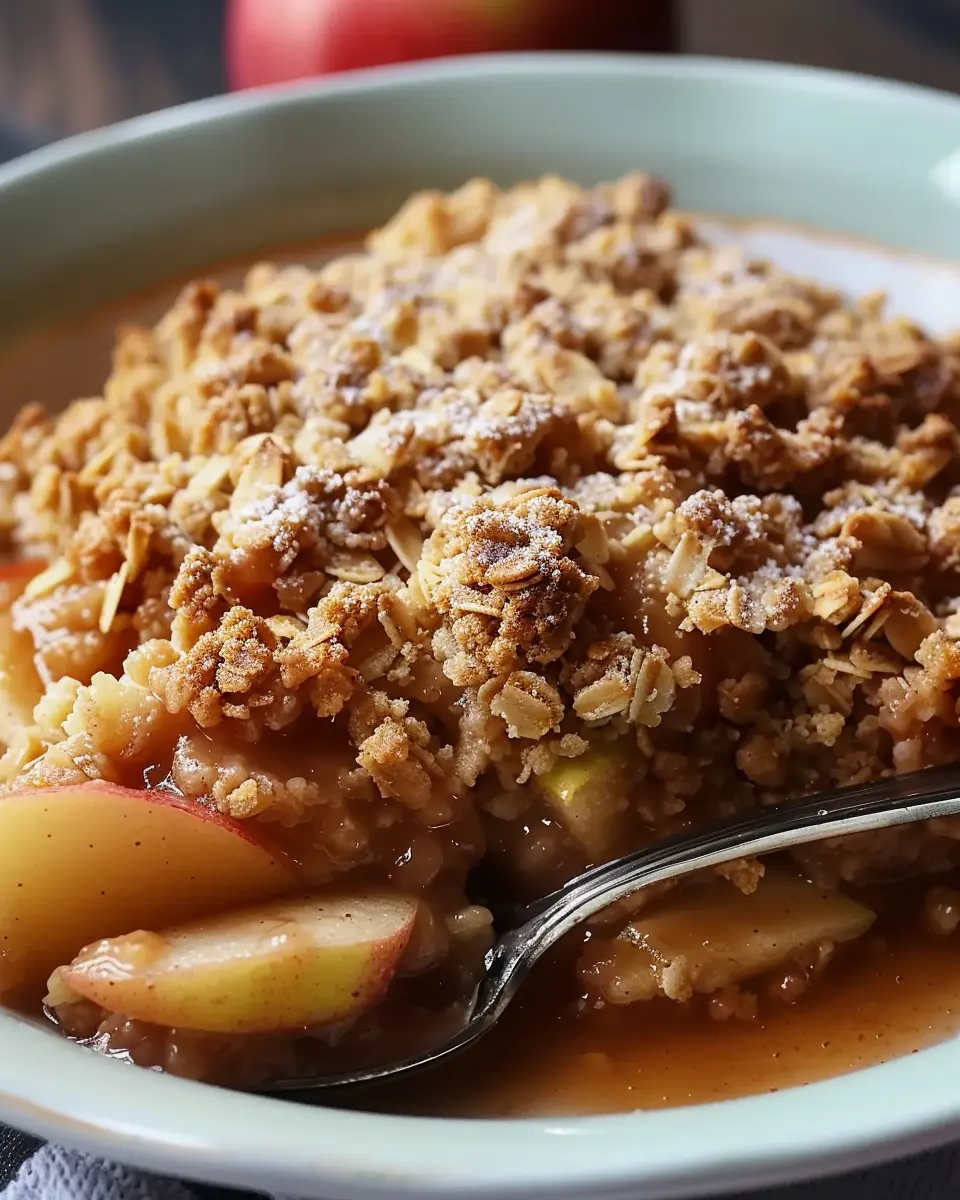
Bake your old-fashioned apple crisp in the preheated oven for 35 to 45 minutes. Look for that golden-brown color on top, and when the apples are bubbly and tender, you know it’s ready. The aroma wafting through your kitchen will be irresistible!
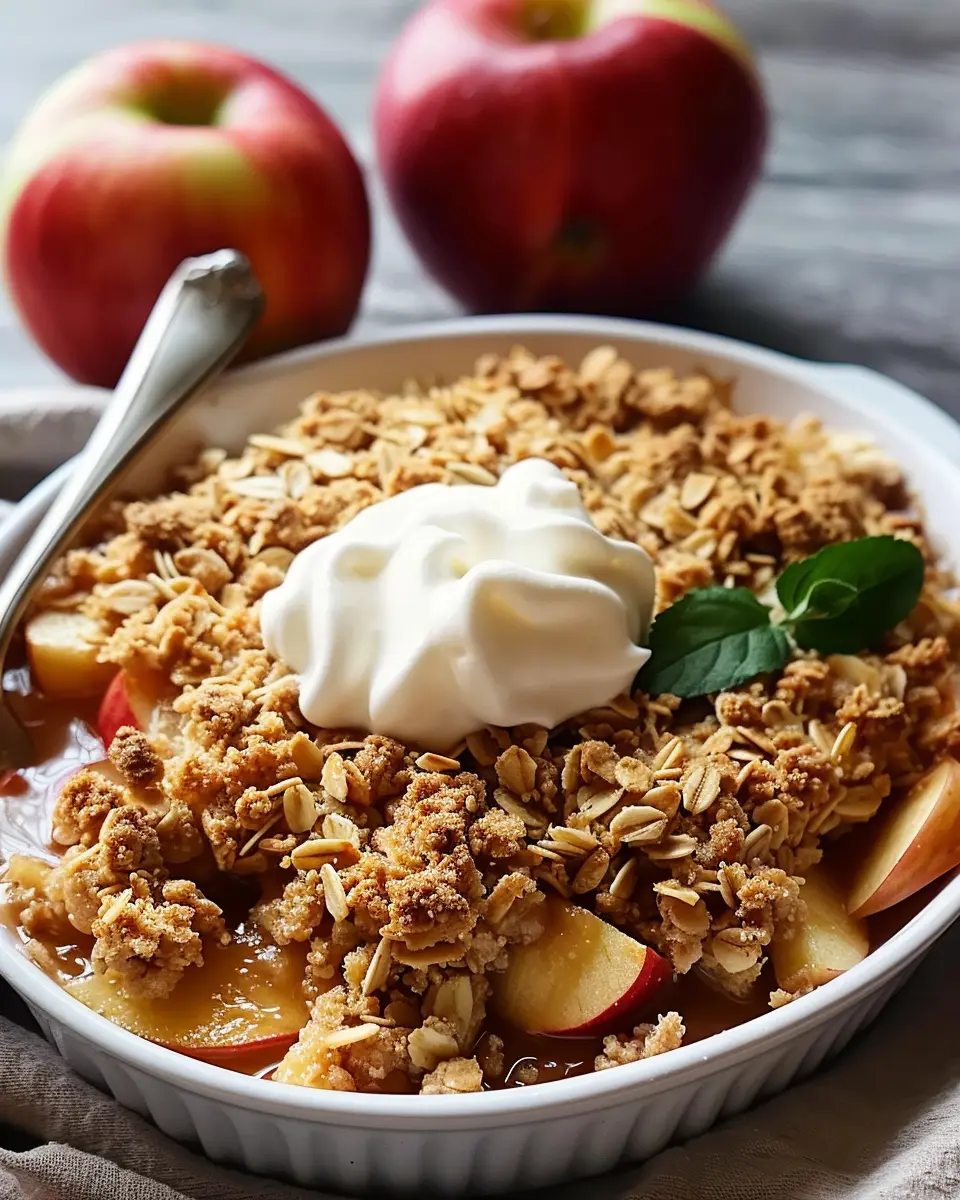
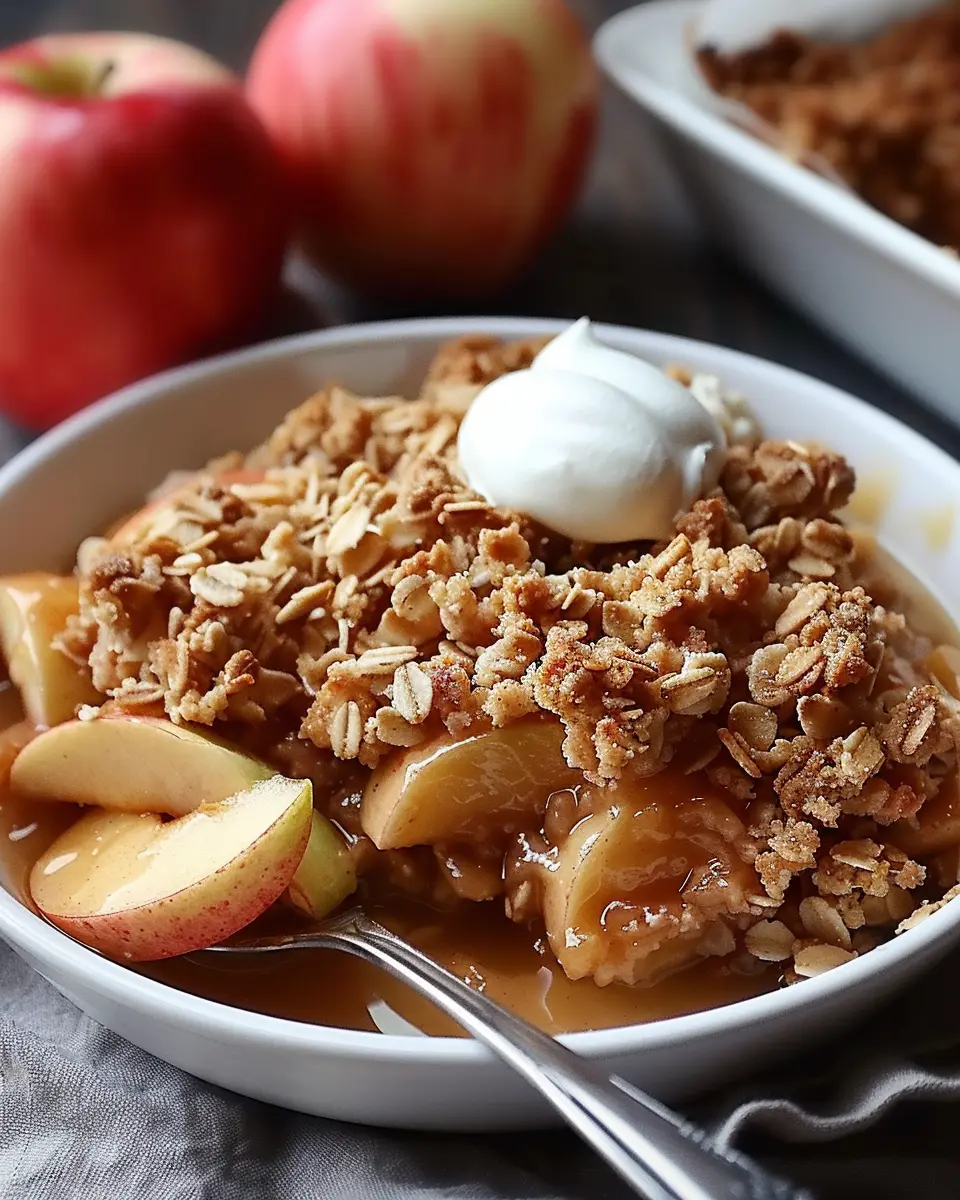
For serving, consider pairing it with a scoop of vanilla ice cream or a dollop of whipped cream. Not only does it elevate the dish, but it also complements the warmth of the apples beautifully.
With these steps, you’re well on your way to creating a heartwarming dessert that truly embodies the charm of old-fashioned cooking. Happy baking!
Variations on Old-Fashioned Apple Crisp
Gluten-Free Apple Crisp
If you’re looking to enjoy old-fashioned apple crisp without the gluten, you’re in luck! Swapping out the traditional flour for gluten-free alternatives like almond flour or oat flour can make this dessert accessible for everyone. For a delightful crunch, consider using certified gluten-free oats in your topping. Not only do these ingredients hold the familiar sweetness and flavor, but they also provide a nourishing twist. You might want to check out resources from the Celiac Disease Foundation for more gluten-free tips that can elevate your baking game.
Adding Spices and Fruits for Flavor
Why stop at just apples? Elevate your old-fashioned apple crisp by introducing a medley of spices and fruits. A sprinkle of cinnamon, nutmeg, or even clove can add warmth and complexity; if you’re feeling adventurous, try adding some cardamom for an exotic touch.
Consider mixing in fruits like pears or berries to create a delightful blend. Did you know that incorporating berries not only adds flavor but also packs a punch of antioxidants? This blend not only enhances the texture but brings a bright burst of color to your dish.
Experimenting with these variations can be a fun way to make the recipe your own. Perhaps try a layer of caramel sauce in the center for an indulgent twist or topping it with a scoop of refreshing vanilla ice cream for that perfect contrast in temperatures. With these ideas, your apple crisp will surely stand out at any gathering!
Cooking Tips and Notes for Old-Fashioned Apple Crisp
Choosing the Right Apples
The heart of your old-fashioned apple crisp lies in the apples you choose. Opt for a mix of tart and sweet varieties like Granny Smith and Honeycrisp. These create a delightful contrast that enhances the flavor profile. Did you know that using different textures can elevate your dish? Mix smooth-fleshed apples with those that hold their shape well. For a deep dive into apple varieties, check out The Spruce Eats.
Getting the Perfect Crumb Topping
Achieving that ideal crumble is all about balance. You want it to be buttery and crumbly without being soggy. Use cold butter and combine it with oats, flour, brown sugar, and a pinch of cinnamon. Don’t be shy to experiment! Adding nuts like walnuts or pecans offers a delightful crunch. Remember to let it cool slightly before serving; this allows the topping to set beautifully.
Whip up your old-fashioned apple crisp and savor the comforting flavors that remind you of home. You might just find yourself making this a regular feature in your kitchen!
Serving suggestions for Old-Fashioned Apple Crisp
Pairing with Ice Cream or Whipped Cream
To elevate your old-fashioned apple crisp, consider serving it with a scoop of vanilla ice cream or a dollop of freshly whipped cream. The warm, spiced apples create a delightful contrast with the cold creaminess, making each bite an indulgent experience. For an extra touch, you might drizzle caramel sauce over the top or sprinkle a pinch of cinnamon for visual flair.
Enjoying Leftovers in Different Ways
Leftovers from your delicious old-fashioned apple crisp can be transformed into delightful new treats! Try reheating a portion in the oven and serving it as a breakfast treat topped with Greek yogurt and nuts. Alternatively, consider layering the crisp with granola for a wholesome dessert parfait. According to a Harvard study on food waste, repurposing leftovers not only saves money but also reduces waste, making your culinary efforts even more rewarding. Who knew one recipe could spark so many tasty possibilities? Enjoy your old-fashioned apple crisp in exciting new ways!
Time breakdown for Old-Fashioned Apple Crisp
When the craving for a warm dessert strikes, nothing fits the bill quite like an old-fashioned apple crisp. Understanding the time commitment can help you plan better, making your kitchen adventure smoother and more enjoyable.
Preparation time
Getting started with your old-fashioned apple crisp doesn’t take long! You’ll need about 15-20 minutes to slice your apples and mix together the perfect crumble topping. Feeling a bit slow? Don’t worry! Take your time; kitchen moments should be savored, just like the dish itself.
Baking time
Now comes the best part. Baking your crisp will take roughly 30-35 minutes. During this time, your kitchen will become a warm haven, filling the air with delicious scents that will have everyone eagerly waiting.
Total time
In total, you’re looking at about 50-55 minutes from start to finish. This time investment yields a delightful dessert that’s ideal for gatherings or a quiet evening at home. Trust me, the results are worth every minute spent! For more tips on apple varieties, check out this helpful guide that can elevate your crisp even further. Happy baking!
Nutritional Facts for Old-Fashioned Apple Crisp
Calories per serving
An average serving of old-fashioned apple crisp typically contains around 200-300 calories, depending on the specific recipe and portion size. This comforting dessert combines the natural sweetness of apples with a crunchy topping, making it a delightful choice for a treat without going overboard on calories.
Nutritional benefits of apples
The star of our old-fashioned apple crisp is undoubtedly the apples. Packed with dietary fiber, vitamins, and antioxidants, apples offer several health benefits:
- Rich in fiber: Apples contain both soluble and insoluble fiber, which aids digestion and can help maintain healthy cholesterol levels.
- Low in calories: They provide a satisfying sweetness without adding too many calories to your diet.
- Packed with vitamins: Apples are a great source of Vitamin C, which supports your immune system.
- Antioxidants: The presence of quercetin and other phytochemicals can contribute to overall health, potentially reducing the risk of chronic diseases.
For more on the health benefits of fruits, you can check out Healthline’s article on apples for some fascinating insights.
So, not only does your old-fashioned apple crisp taste amazing, but its main ingredient brings a host of nutritional perks as well! When enjoyed in moderation, this dessert can be a guilt-free addition to your meal rotation, satisfying your sweet tooth while nourishing your body.
FAQs about Old-Fashioned Apple Crisp
Can I make apple crisp ahead of time?
Absolutely! One of the beauties of old-fashioned apple crisp is that you can prepare it in advance. You can mix the apple filling and topping separately and store them in the refrigerator for up to 24 hours. When you’re ready to bake, assemble them in your baking dish and pop it in the oven. Just be aware that baking a chilled crisp might take a tad longer, so keep an eye on it!
How do I store leftover apple crisp?
To store any leftover old-fashioned apple crisp, let it cool completely, then transfer it to an airtight container. In the refrigerator, it should stay fresh for about 3–5 days. If you want to enjoy it later, think about freezing it! Wrap the cooled crisp tightly in foil or place it in a freezer-safe container. You can freeze it for up to three months. When you’re ready to enjoy it, simply thaw it overnight in the fridge, then reheat it in the oven for that fresh-baked taste.
What are the best apples to use?
Choosing the right apples is key to that perfect old-fashioned apple crisp. Look for varieties that balance sweetness and tartness. Some great choices include:
- Granny Smith: They’re tart and hold their shape well when baked.
- Honeycrisp: Sweet and juicy, these add a lovely flavor.
- Braeburn: Another balanced option that offers both sweet and tart.
For the best flavor, consider using a mix of apples. This way, you’ll get a complex taste that makes your apple crisp truly stand out. Curious about more apple varieties? Check out this helpful guide on apple types for more insights.
Whether you’re baking this dish for a cozy night in or a gathering, these tips will help you nail it every time!
Conclusion on Old-Fashioned Apple Crisp
Embracing homemade goodness
Savoring a warm bowl of old-fashioned apple crisp can transport you back to simpler times, where the act of baking was a joyful experience shared with loved ones. Making this dessert from scratch not only delivers comforting flavors but also fills your home with irresistible aromas.
Choosing fresh, seasonal apples elevates the dish, while the golden, crumbly topping adds a delightful texture. After a busy week, there’s something special about treating yourself to a sweet, homemade delight. So, grab those apples and start baking! Your friends and family will thank you, and who knows? This may just become your go-to dessert every fall. Check out resources on Cooking Light for more timeless recipes that keep tradition alive.
PrintOld-Fashioned Apple Crisp: The Best Cozy Dessert Recipe
Enjoy a warm serving of this Old-Fashioned Apple Crisp, perfect for chilly evenings and gatherings.
- Prep Time: 15 minutes
- Cook Time: 50 minutes
- Total Time: 1 hour 5 minutes
- Yield: 8 servings
- Category: Dessert
- Method: Baking
- Cuisine: American
Ingredients
- 6 cups sliced apples
- 1 teaspoon lemon juice
- 3/4 cup granulated sugar
- 1 teaspoon ground cinnamon
- 1/2 cup all-purpose flour
- 1 cup rolled oats
- 1/2 cup brown sugar
- 1/2 cup unsalted butter, melted
Instructions
- Preheat the oven to 350°F (175°C).
- In a large bowl, mix sliced apples and lemon juice, then toss with granulated sugar and cinnamon.
- Transfer the apple mixture to a baking dish.
- In another bowl, combine flour, oats, brown sugar, and melted butter.
- Spread the oat mixture over the apples.
- Bake for 45-50 minutes, or until the apples are tender and the topping is golden brown.
Notes
- Serve warm with vanilla ice cream for a delicious treat.
- This recipe can be easily doubled for larger gatherings.
Nutrition
- Serving Size: 1 serving
- Calories: 300
- Sugar: 25g
- Sodium: 150mg
- Fat: 12g
- Saturated Fat: 7g
- Unsaturated Fat: 3g
- Trans Fat: 0g
- Carbohydrates: 45g
- Fiber: 3g
- Protein: 2g
- Cholesterol: 30mg


")