
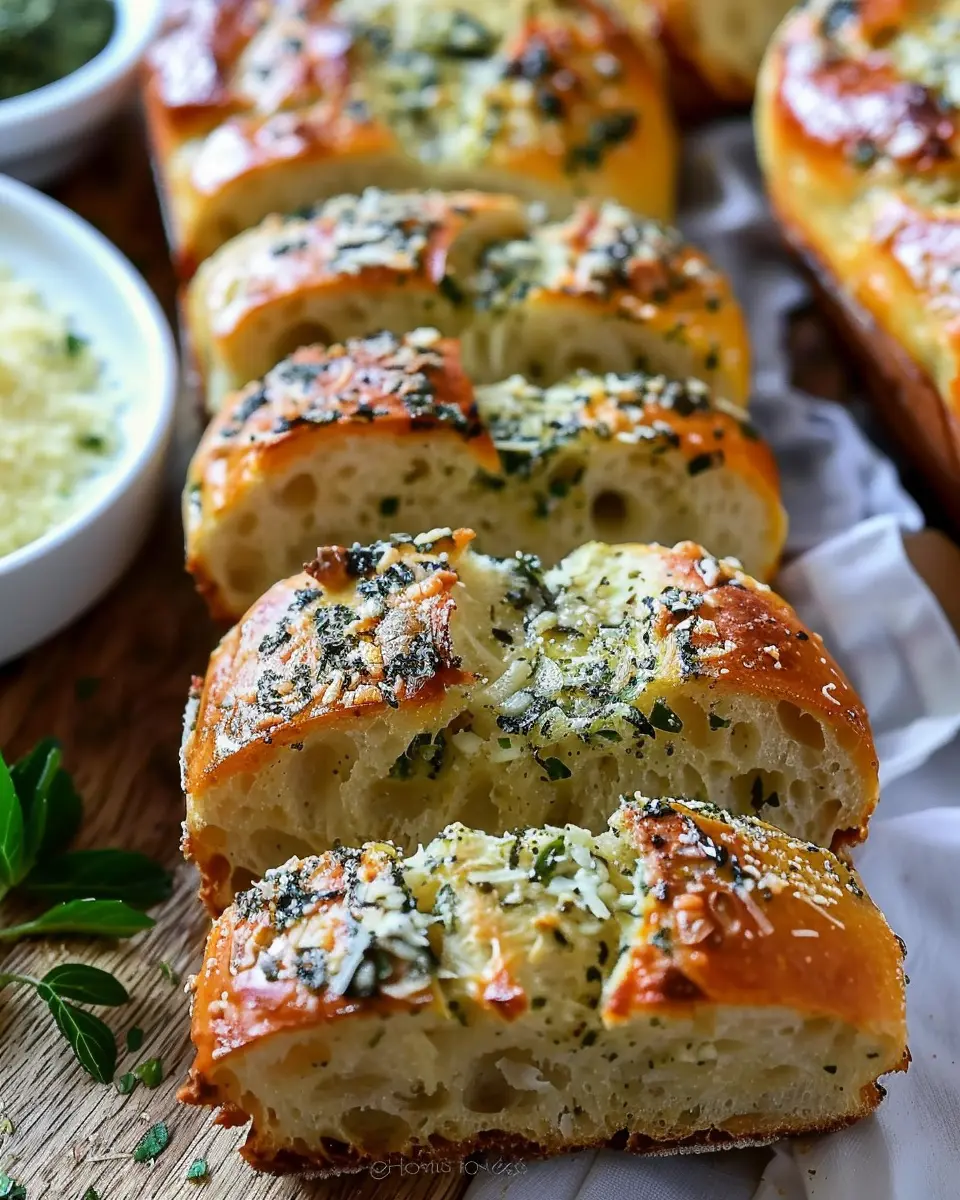
Introduction to Garlic Parmesan Herb Bread
Making your own bread can be an incredibly rewarding experience, one that surpasses fast food options every time. Have you ever walked into a bakery and been enveloped by the warm, enticing aroma of freshly baked bread? The joy of bringing that experience into your home is just one reason to try your hand at homemade bread. Not only is it healthier, often containing no preservatives and less sodium, but it’s also customizable! Imagine being able to adjust flavors to suit your preferences—like adding delicious Garlic Parmesan Herb Bread to your dinner table.
Why Homemade Bread Beats Fast Food Every Time
When it comes to convenience, fast food definitely has its appeal. However, homemade bread, like our Garlic Parmesan Herb Bread, is not only more flavorful but also a healthier choice. Store-bought breads can be loaded with preservatives, artificial flavors, and high levels of sugar. According to a study published by the International Journal of Food Sciences, foods with fewer preservatives tend to be healthier and appreciated by your body. Why settle for less when you can bake something from scratch, loaded with fresh ingredients?
Making Garlic Parmesan Herb Bread can be a delightful journey. It’s easy to prepare and can turn an ordinary meal into something extraordinary with just a few simple steps. Plus, the ingredients—flour, butter, garlic, Parmesan cheese, and herbs—are typically things you might already have in your pantry or fridge. Many culinary experts recommend using fresh herbs for the best flavor, and seasonal ingredients always elevate any dish. If you’re looking to support local farms, check out farmers’ markets for vibrant herbs!
The Joy of Baking Your Own Bread
Baking your own bread connects you to a timeless culinary tradition that many cultures hold dear. The act of kneading dough can be incredibly therapeutic, almost meditative. Picture yourself shaping the dough, feeling its textures, and even sneaking a taste of that butter basil garlic mixture—it’s pure bliss.
So why not make today the day you embrace bread-making? Your kitchen could soon be filled with delightful scents that will keep friends and family coming back for more. If you’re ready, roll up your sleeves, grab your mixing bowl, and let’s dive into creating your very own Garlic Parmesan Herb Bread!
Ingredients for Garlic Parmesan Herb Bread
When it comes to whipping up a scrumptious loaf of Garlic Parmesan Herb Bread, having the right ingredients is key. This recipe is perfect for gatherings or simply for enjoying a cozy night in with friends. Here’s what you’ll need to get started:
- All-purpose flour: About 3 cups for that fluffy texture.
- Warm water: 1 ½ cups to activate the yeast. Aim for a temperature around 110°F to ensure it works its magic.
- Active dry yeast: 1 packet, so your bread rises beautifully.
- Salt: 1 teaspoon to enhance all those delicious flavors.
- Olive oil: ¼ cup for richness, complementing the garlic and herbs perfectly.
- Fresh garlic: Minced, about 4 cloves. Don’t skimp on this; it’s garlic bread, after all!
- Parmesan cheese: ¾ cup, freshly grated. This will give your bread that irresistible cheesy bite.
- Mixed herbs: A combination of rosemary, thyme, and parsley adds freshness and depth.
For further inspiration, check out The Spruce Eats for tips on bread baking. So, are you ready to dive into the kitchen and create this aromatic masterpiece? Let’s go!
Step-by-step Preparation of Garlic Parmesan Herb Bread
Making Garlic Parmesan Herb Bread in your own kitchen is a delightful experience that fills your home with tantalizing aromas and warms the soul. This step-by-step guide will ensure that you have all the tools and knowledge to create the perfect loaf!
Activate the yeast
The journey begins by waking up your yeast!
- Gather 1 packet (or about 2¼ teaspoons) of active dry yeast and mix it with 1 cup of warm water (between 100°F and 110°F).
- Add a teaspoon of sugar to feed the yeast. Let this mixture sit for about 5 to 10 minutes, until you see bubbles forming on the surface. This means your yeast is alive and kicking! If it doesn’t, your yeast may be expired, and you’ll want to get a fresh packet.
Have you ever seen the magic that happens when yeast activates? It’s fascinating how a simple ingredient can transform the texture of your bread!
Combine the ingredients
Once your yeast is active, it’s time to mix everything.
- In a large mixing bowl, add 3 cups of all-purpose flour.
- Incorporate ½ teaspoon of salt, 2 tablespoons of minced garlic, and ¼ cup of grated Parmesan cheese. Feel free to adjust the garlic and cheese amounts to your preference—after all, who doesn’t love extra cheese?
Now, slowly pour your yeast mixture into the dry ingredients. Stir until it forms a shaggy dough. The aroma of garlic at this stage will start to get your taste buds excited.
Knead the dough
Kneading is crucial for developing gluten, which gives your Garlic Parmesan Herb Bread that lovely, chewy texture.
- Transfer the shaggy dough onto a lightly floured surface.
- Knead the dough for about 8 to 10 minutes. If it’s sticky, sprinkle a bit more flour, but be careful not to add too much; you want a moist dough that holds together nicely.
As you knead, you’ll feel the dough becoming stretchy and elastic. It’s labor-intensive but therapeutic – a great stress-reliever after a long day!
First rise
Now that we’ve kneaded the dough, it’s time for it to rise.
- Place your kneaded dough into a lightly greased bowl and cover it with a damp towel or plastic wrap.
- Let it rise in a warm place for about 1 hour or until it doubles in size.
If you’re in a rush, you can place the dough in a slightly warm oven (turn it off after preheating) so it can rise quicker. This waiting game is always worth it as the dough transforms beautifully.
Shape the loaves
Once risen, it’s shaping time!
- Punch down the dough to release any air bubbles. Flour your hands, then divide the dough in half.
- Shape each half into a loaf or round, whichever you prefer. If you want, you can also braid the dough for a fun twist.
Your Garlic Parmesan Herb Bread is taking shape nicely!
Second rise
Let’s give those loaves a little more time to puff up.
- Place the shaped dough on a baking sheet lined with parchment paper. Cover again with a towel or plastic wrap.
- Allow them to rise for another 30 minutes. You’ll notice they become even fluffier!
Bake the bread
Finally, it’s time for the moment you’ve been waiting for!
- Preheat your oven to 375°F (190°C).
- Bake the loaves for 25 to 30 minutes, or until they appear golden brown and sound hollow when tapped on the bottom. For an extra flavor boost, brush melted butter over the top right when they come out of the oven.
Is there anything quite like warm, homemade bread slathered with butter? Enjoy your delicious Garlic Parmesan Herb Bread straight from the oven or use it to complement your favorite meals.
Feel free to share your baking experiences or variations with us! Happy baking!
Variations of Garlic Parmesan Herb Bread
When it comes to Garlic Parmesan Herb Bread, the beauty lies in its versatility. You can easily personalize it to match your taste buds and make it uniquely yours. Let’s explore a couple of fun variations.
Adding Different Herbs
Switching up the herbs can dramatically change the flavor profile of your Garlic Parmesan Herb Bread. Here are some fantastic suggestions to consider:
- Basil: Add dried or fresh basil for a slightly sweet and aromatic touch.
- Oregano: Pair this with the existing garlic for a Mediterranean twist.
- Thyme: Gives your bread an earthy flavor, perfect for a comforting meal.
- Rosemary: A pine-like essence that adds a warm, rustic vibe.
Feel free to mix and match! Fresh herbs typically lend a brighter taste, while dried herbs offer more concentrated flavors. If you’re looking for inspiration, the Herb Society of America has an array of ideas for you to explore.
Experimenting with Cheeses
Don’t stop at Parmesan; cheese can take your Garlic Parmesan Herb Bread to new heights. Trying different varieties could be your next go-to move:
- Mozzarella: Soft and gooey, it complements the garlic wonderfully.
- Cheddar: This sharp cheese adds a punchy flavor that pairs well with the herb mix.
- Feta: Crumbled feta provides a tangy flair that contrasts beautifully with the garlic.
Imagine biting into a slice of warm bread loaded with melty cheese—sounds tempting, doesn’t it? According to Cheese Enthusiasts, mixing cheeses can elevate your culinary experiences as each offers its unique taste and texture.
With these variations, your Garlic Parmesan Herb Bread can easily become a staple in your cooking repertoire, perfect for any occasion!
Cooking Tips and Notes for Garlic Parmesan Herb Bread
Keeping Your Bread Fresh
To make sure your Garlic Parmesan Herb Bread stays fresh and delicious long after baking, store it in a paper bag at room temperature for a couple of days. If you want to keep it for longer, wrap it tightly in plastic wrap and freeze it. This bread can be frozen for up to three months; just thaw it on the counter and reheat in the oven for that freshly baked taste.
Avoiding Common Bread-Making Mistakes
Bread-making can be a bit tricky, but with a few tips, you’ll be a pro in no time! Here’s what to watch out for:
- Don’t rush the rising: Yeast needs time to work; if your dough isn’t rising, try a warmer spot or allow more time.
- Measure accurately: Too much flour can lead to dense bread. Always spoon the flour into your measuring cup and level it off for precision.
- Know your dough: When mixing your Garlic Parmesan Herb Bread, ensure the dough is slightly tacky but not sticky. Adjust with extra flour or water as needed.
For more insights on bread-making fundamentals, check out sources like King Arthur Baking. Happy baking!
Serving Suggestions for Garlic Parmesan Herb Bread
Perfect Pairings with Soups and Salads
This Garlic Parmesan Herb Bread is a delightful companion to just about any soup or salad you prepare. Its rich, cheesy flavor and aromatic herbs complement creamy soups like butternut squash or hearty options like chicken noodle. Imagine pairing your bread with a fresh Caesar salad or a classic minestrone – a match made in culinary heaven. For some inspiration, check out this article on Flavor Combinations that highlights great soup and bread duos.
Creative Ways to Enjoy Your Bread
Get a little adventurous! The versatility of your Garlic Parmesan Herb Bread allows for innovative ways to incorporate it into meals. Think of using it as the base for an open-faced sandwich topped with Turkey Bacon and avocado or layering it with Chicken Ham for a tasty twist. You can even slice it into chunks and serve it as a delightful appetizer with a homemade herb dip – perfect for hosting friends or a cozy evening at home.
With these serving suggestions, your Garlic Parmesan Herb Bread will not only enhance but elevate your dining experience!
Time Breakdown for Garlic Parmesan Herb Bread
Understanding the time commitment for making Garlic Parmesan Herb Bread is essential for planning your cooking session. Here’s a quick breakdown to keep you organized.
Preparation Time
Getting started takes about 15 minutes. This phase involves mixing your ingredients, measuring, and getting everything ready for dough-making. Trust me, it sets the stage for success!
Rising Time
This is where the magic happens! Allow your dough to rise for about 1 hour. During this time, you can relax or prepare a side dish, like a refreshing salad or some roasted veggies.
Baking Time
Your tasty creation will need about 25-30 minutes in the oven. The aroma that fills your kitchen during this time is truly unbeatable!
Total Time
All in all, you’re looking at about 1 hour and 45 minutes from start to finish, including preparation and rising time. Isn’t it rewarding to know you can whip up such deliciousness?
For more tips on bread-making, check out resources from King Arthur Baking or Serious Eats!
Nutritional Facts for Garlic Parmesan Herb Bread
Calories per slice
Wondering about the caloric content of your delicious home-baked Garlic Parmesan Herb Bread? Each slice typically contains around 150-200 calories, depending on the specific ingredients and portion size you choose. This makes it a delightful addition to your meal without tipping the scales too much.
Macronutrient breakdown
Let’s dive into the macronutrient breakdown. A slice of Garlic Parmesan Herb Bread generally offers:
- Carbohydrates: Approximately 30g, providing the energy boost you need.
- Protein: About 6g, thanks to the cheese and other enriching ingredients.
- Fats: Roughly 4-6g, which can vary depending on how much butter or oil you incorporate.
This combination not only satisfies your taste buds but also nourishes your body. If you’re seeking more nutritional insights, check out resources like the USDA Nutrient Database for comprehensive data. Enjoy your baking!
FAQs about Garlic Parmesan Herb Bread
Can I make this bread in advance?
Absolutely! One of the joys of Garlic Parmesan Herb Bread is that it can be prepped ahead of time. You can make the dough, let it rise, and shape it into a loaf or rolls. Wrap it tightly in plastic wrap once shaped and refrigerate it for up to 24 hours. When you’re ready to enjoy it, just let it come to room temperature, perform a quick second rise, and bake. This can save you time on a busy night, and the flavors will even develop further!
What’s the best way to store leftover bread?
To keep your Garlic Parmesan Herb Bread fresh, store any leftovers in an airtight container or wrap it tightly in foil. This prevents it from drying out. For optimum freshness, consume it within 2-3 days. If you live in a humid environment, consider adding a slice of bread in the container to help retain moisture. For more storage tips, check out resources like the USDA’s food storage guidelines.
Can I freeze Garlic Parmesan Herb Bread?
Yes, you can freeze Garlic Parmesan Herb Bread! This is a fantastic way to enjoy it later. Once the bread cools completely, wrap it tightly in plastic wrap, followed by aluminum foil for added protection. Label it with the date and freeze it. It can last for up to three months in the freezer. To enjoy, simply thaw it overnight in the fridge or at room temperature. Then pop it in a preheated oven to refresh the crust for a delightful experience.
For more tips on preserving bread, check out King Arthur Baking.
Conclusion on Garlic Parmesan Herb Bread
Making your own Garlic Parmesan Herb Bread at home can be a rewarding experience that outweighs any store-bought option. Not only will you fill your kitchen with the delightful aroma of fresh-baked bread, but you’ll also gain a sense of accomplishment when you pull that golden loaf from the oven.
Don’t worry if you’re new to baking; it’s simpler than it seems! With just a few ingredients and some patience, you can create a delicious side dish or snack. Imagine enjoying warm slices paired with your favorite soups or as a fantastic addition to your dinner table. Ready to get started? Embrace the challenge, and who knows—you might just find your new favorite hobby!
For more baking tips, check out sites like King Arthur Baking or The Kitchn. Happy baking!
PrintGarlic Parmesan Herb Bread: The Best Homemade Delight for All

This Garlic Parmesan Herb Bread is a delightful homemade treat bursting with flavor, perfect for any occasion.
- Prep Time: 15 minutes
- Cook Time: 30 minutes
- Total Time: 1 hour 45 minutes
- Yield: 1 loaf
- Category: Bread
- Method: Baking
- Cuisine: Italian
- Diet: Vegetarian
Ingredients
- 3 cups all-purpose flour
- 1 tablespoon sugar
- 1 teaspoon salt
- 1 packet active dry yeast
- 1 cup warm water
- 2 tablespoons olive oil
- 4 cloves garlic, minced
- 1 cup grated Parmesan cheese
- 2 tablespoons fresh herbs (like parsley or basil)
Instructions
- In a large bowl, combine warm water, sugar, and yeast. Let it sit for 5 minutes.
- Add the olive oil, flour, and salt to the yeast mixture. Mix until a dough forms.
- Knead the dough on a floured surface for about 8-10 minutes until smooth.
- Place the dough in a greased bowl, cover with a cloth, and let it rise for 1 hour.
- Preheat your oven to 375°F (190°C).
- Punch down the dough and fold in the minced garlic, Parmesan cheese, and herbs.
- Shape the dough into a loaf and place it in a greased loaf pan.
- Let the dough rise again for 30 minutes.
- Bake for 25-30 minutes until golden brown.
- Cool before slicing and serve.
Notes
- For a richer flavor, allow the bread to cool completely before slicing.
- This bread pairs well with soups and salads.
Nutrition
- Serving Size: 1 slice
- Calories: 120
- Sugar: 1g
- Sodium: 150mg
- Fat: 3g
- Saturated Fat: 0.5g
- Unsaturated Fat: 2g
- Trans Fat: 0g
- Carbohydrates: 20g
- Fiber: 1g
- Protein: 4g
- Cholesterol: 0mg


")